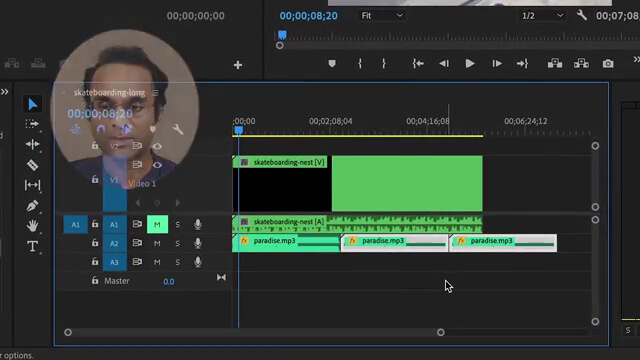
In our last video about adding music, we learned that if a video is longer than a music track, we can repeatedly drag and drop the music track over to the timeline. But we also understood that this is not the best practice as the music will not have smooth transitions between each clip.
The process of extending music requires mixing portions of music together, which is a tedious and time-consuming task if done manually. But if you have Adobe Audition, your music can be mixed with great results within a fraction of the time. This tutorial shows you how.
Once you have already determined that your music and your video are not the same length, you can have Adobe Audition lengthen and remix it for you.
Editing in Adobe Audition
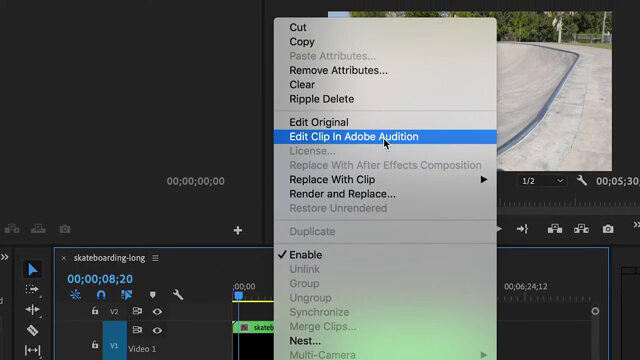
- Right Click on the music in the Timeline.
- Choose Edit Clip In Adobe Audition (if you do not have Adobe Audition installed, it will be grayed out)
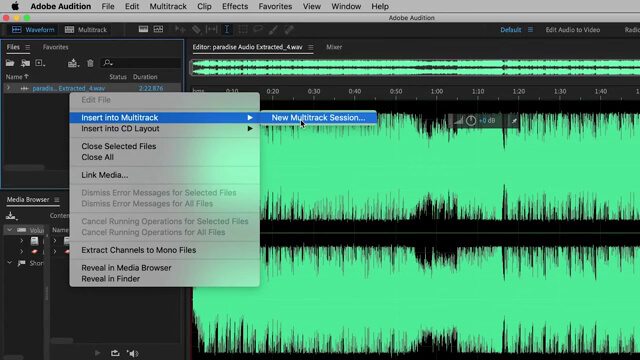
- After the audio file has opened in Audition, Right Click on the name of the file, in the Files Panel.
- Choose Insert Into Multitrack > New Multitrack Session
- In the dialog box, name the session.
- Click “Yes”
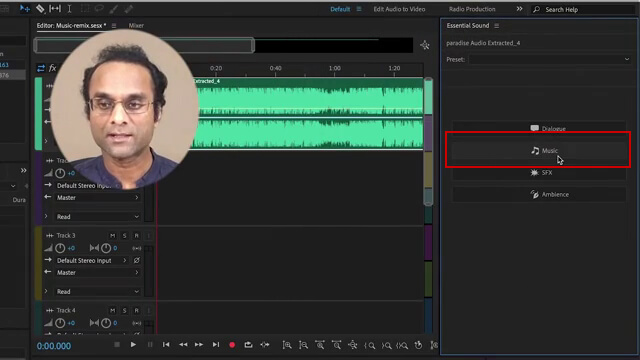
Mixing in Essential Sound Panel
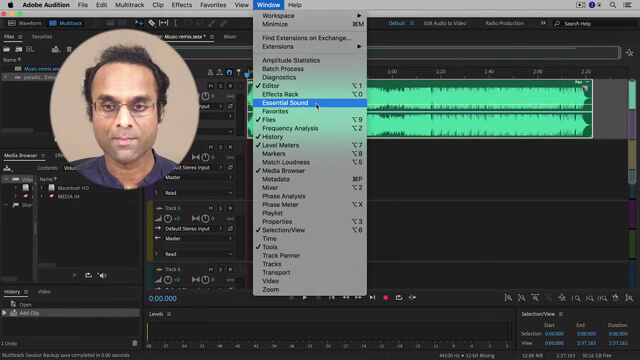
- Find the music in the Timeline.
- Choose Window > Essential Sound
- Inside Essential Sound Panel, click the music button.
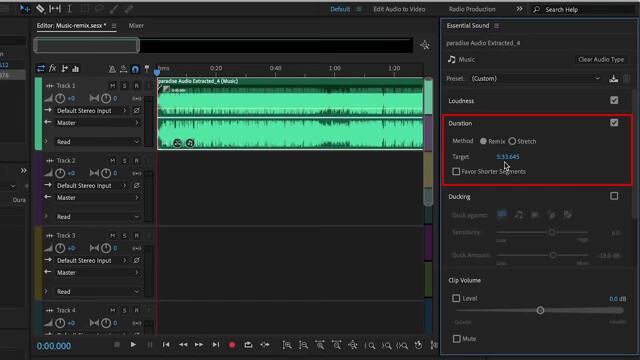
- Check the box next to Duration
- Notice the current length of the music. Pay attention to only the first two sets of numbers (Hours:Seconds), the last set is for samples and can be ignored for this purpose.
- Choose Remix under the duration.
- Enter the time that matches your video in the Target box. (The time can be greater than or less than the original track, depending on the length of your video.) Audition does not produce a “to the second” remix, so you may have to adjust your seconds down about 10 seconds to get as close as possible to your target time.
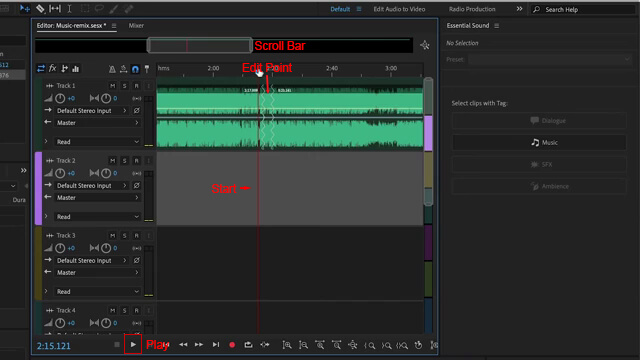
Checking Quality of Mix
- Using the scroll bar at the top of the panel, look for zig-zag lines, these are the edit points created by Audition.
- Click shortly before the zig-zag lines on the timeline to create a start point for playing the sound.
- Click the play button to listen to the quality of the mix.
- Check each edit point using the same procedure.
Moving Mixed File Back To Premiere Pro
- Click File > Export
- Choose Export to Adobe Premiere Pro

- In the dialog box, check the box for Open in Adobe Premiere Pro
- Click on Export
- A dialog box might open stating that the file already exists, if you would like the existing file overwritten, click yes.
If you want to keep the old file as it is, then click No and follow the procedure to save the newly mixed music file. - A dialog box will open Copy Adobe Audition Tracks
Choose New Audio Track - Click OK
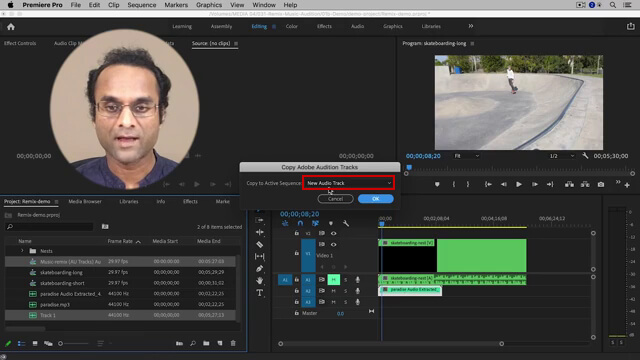
The edited track will appear as a new audio track in your video timeline. The original track may still be in your timeline. In that case, you can either delete it or mute it by clicking the M in the box next to the track.
I hope this tutorial will help you avoid many hours of work. If you like this tutorial, subscribe to my YouTube channel for more great time-saving tutorials.


 Premiere Pro Training Classes
 After Effects Training Classes
 Photoshop Training Classes
 Dreamweaver Training Classes
 Web Development Training Classes
 WordPress Training Classes