• Skip to primary navigation
  • Skip to main content
  • Skip to primary sidebar
  • Skip to footer
  • Home
  • About
  • Videos
  • Blog
  • Contact

Web Guru, Adobe Expert

Video & Web Training Classes

  • Adobe Training Classes
    • Premiere Pro Training Classes
    • After Effects Training Classes
    • Photoshop Training Classes
    • Dreamweaver Training Classes
  • Video Training Classes
  • Web Development Training Classes
Home > Videos

Add Music In Adobe Premiere Pro

January 6, 2021 by Florence Wright

Music can make your video more engaging and help hold your viewers’ interest. This tutorial will show you how to add music to your video in Adobe Premiere Pro.

Importing and Adding Music File:

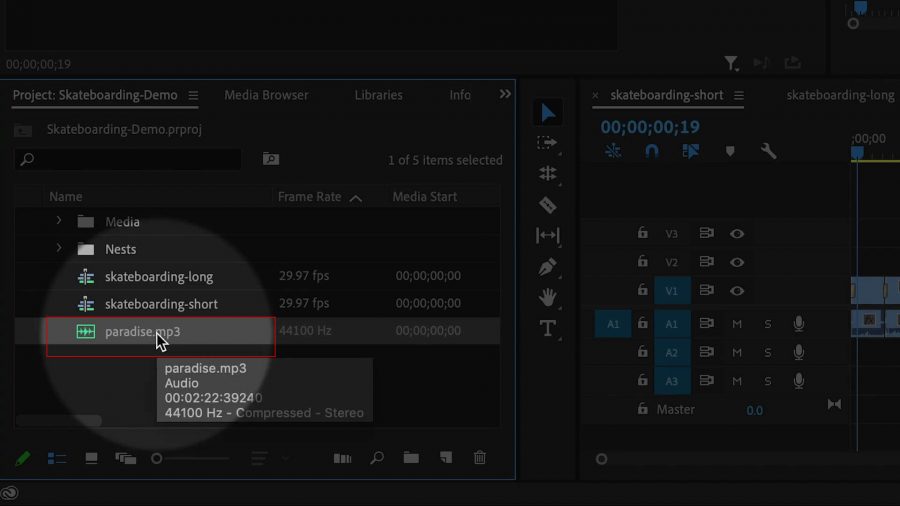
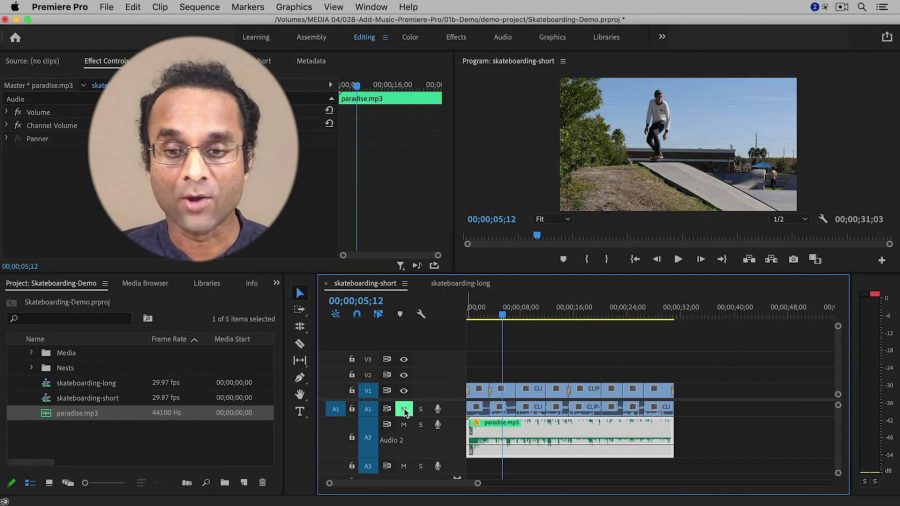
After you have the visual portion of your video set up, then import your music file.

  • File > Import

import-audio

  • Navigate to the file.
  • Select the File.
  • Click Import.
  • Find it in the Project Panel.

find-in-project-panel

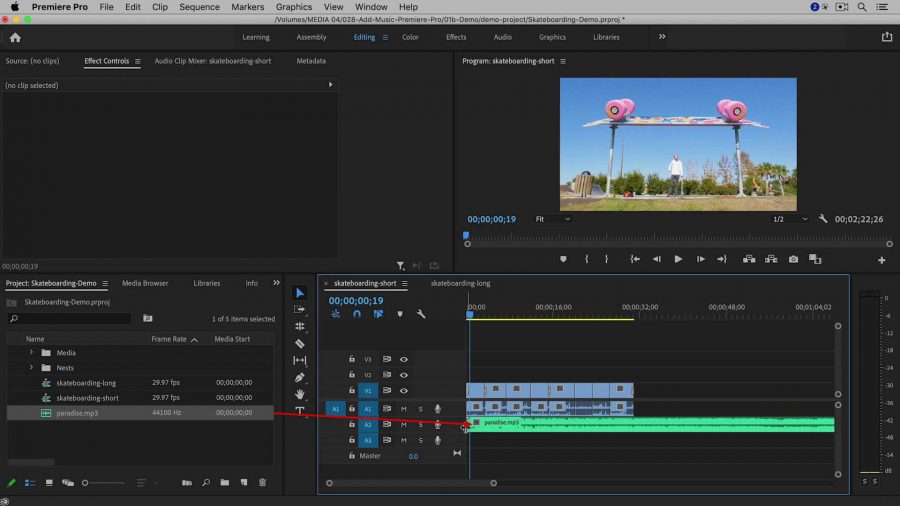
  • Drag and drop music file into the Timeline beneath the video clip.

drag-drop-to-timeline
Adjusting Length To Match Video

If you see that the audio length is much longer than the video length, then you can simply trim the audio file.

  • Zoom out by using the zoom handle under the clips

zoom-timeline

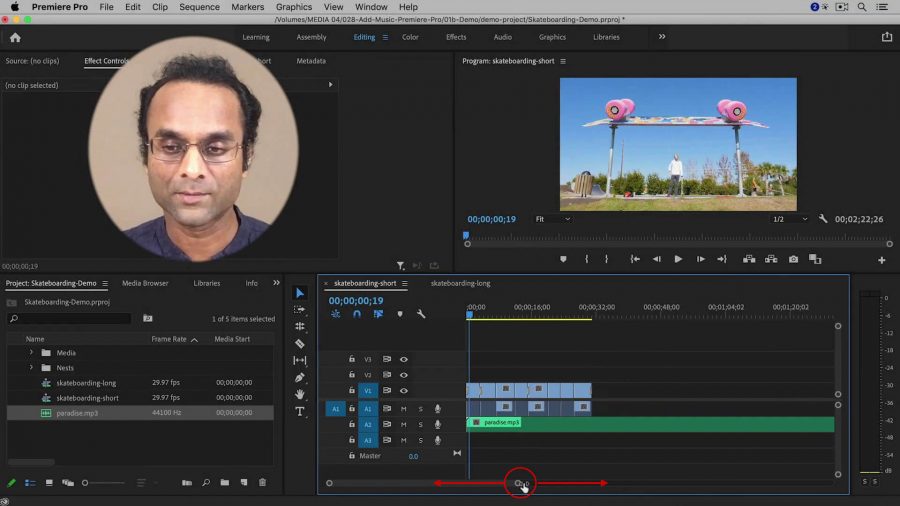
  • Move playhead to end of the Video track, to view where the audio extends beyond the end of the video.
  • Choose the Razor Tool (razor icon).

choose-trim-tool

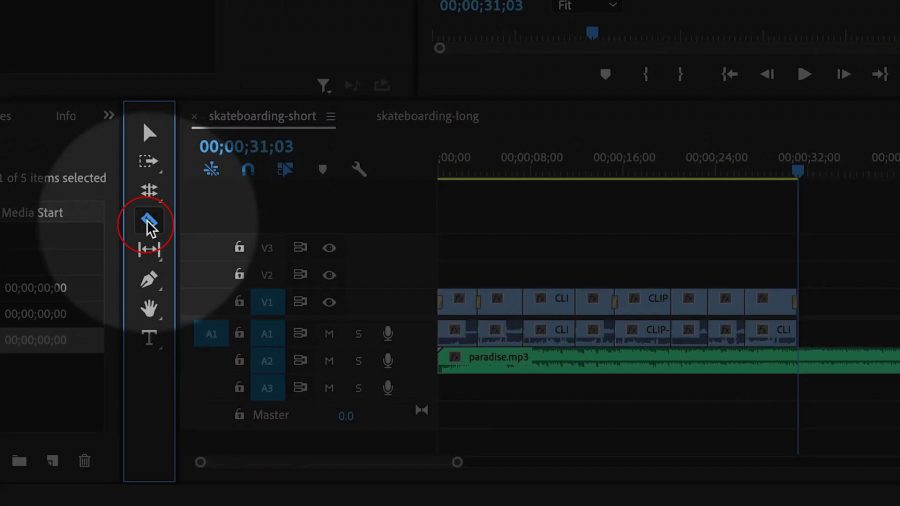
  • Click on the Audio clip, directly underneath the end of the video. The audio clip will be split into two sections.
  • Choose the Select tool.
  • Click on the extra Audio clip to select it
  • Click Delete

trimmed-audio

 If Music is Too Short

If you see that the audio does not match the entire video, then you can drag the audio file, over and over again until the Audio track matches the Video track. Then trim the last clip, following the instructions above.

multiple-audio-and-trimmed

Adjusting Volume and Muting Noise

When you drop the audio file into the Timeline, go ahead and play it. In the Audio Meters, you may see that red lights turn on.

These are warnings that your sound file will be too loud, and it is clipping. (Clipping means there will be distortion in the audio, because the audio output power is higher than the device’s power rating.) So, you need to adjust the volume. If you have multiple Audio clips, then you need to apply the same procedure to each one.

  • Increase the track height either by double-clicking in the empty space to the left of the track or by dragging the line at the bottom of the track down.

increase-track-height

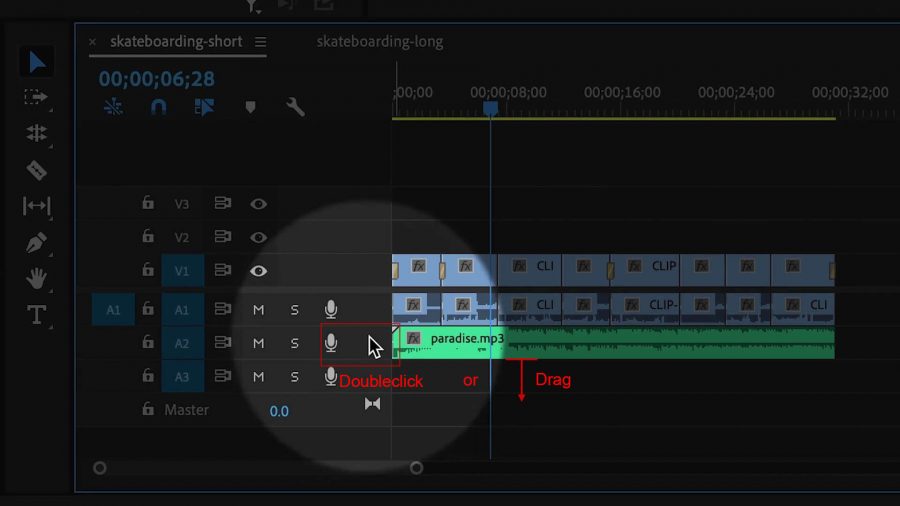
  • Find the white or yellow line across the clip.
  • Drag it up to increase the volume, drag it down to decrease the volume.

Tip: For background, you may want it to be around -20 or -25.

change-volume

  • Mute the Audio on the other Tracks if they are distracting.

mute

Adding and Adjusting Audio Transitions

To prevent the music from starting and stopping abruptly, you will want to add audio transitions to fade the beginning and end of your video.

  • Select the music clip.
  • Go to Sequence > Apply Audio Transitions.

audio-transitions

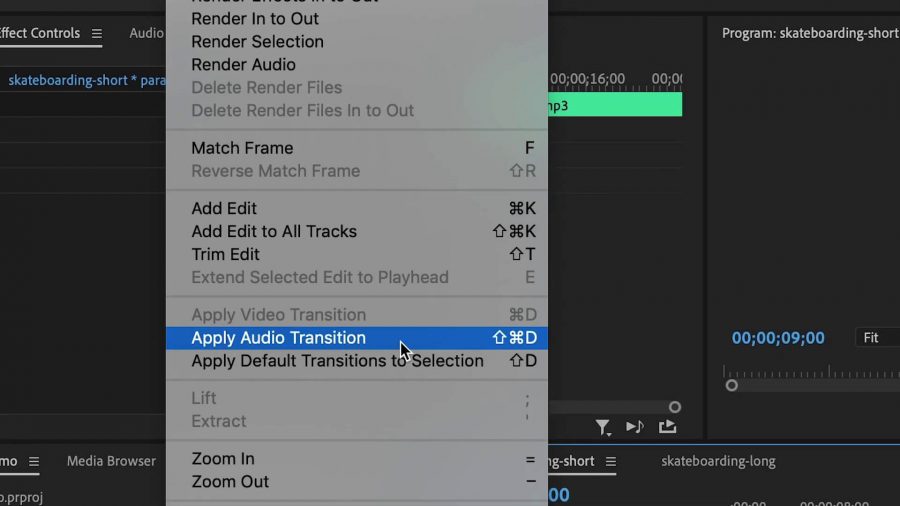
A crossfade will be added to both the beginning and the end of the Audio Clip. This will make the audio start and end smoothly. If you would like to improve the smoothness on either the beginning, end, or both, then you can change the duration of the transition.

  • Double-click on the transition itself.
  • A Dialog Box opens and shows the default as one second
  • Change the duration to the number of seconds you prefer.

Transition-duration

In a future video, I’ll show you how to automatically remix music to be any duration! Stay tuned for that one.

Be sure to subscribe to my YouTube channel in order to stay up to date on my newest tutorials.

Primary Sidebar

Free Online Course!

The fastest, easiest way to learn Premiere Pro for free. Click image below for details.

Adobe Premiere Pro Quick Start Online CourseCLICK FOR DETAILS

Footer

TRAINING CLASSES

Adobe Premiere Pro
Adobe After Effects
Adobe Photoshop
Adobe Dreamweaver
Web Development
WordPress

CONTACT

Submit an inquiry

Premiere Pro Training Classes

Adobe Premiere Pro is the flagship video editing software for professionals. Powerful yet intuitive. Integrates seamlessly with Photoshop, Aftereffects and other Adobe products. Add audio, transitions, graphics, effects and titles. Then take your film to the next level by sweetening and mixing the sound, color correcting, adding keyframes, and compositing the footage. Premiere Pro can natively edit footage from a variety of sources output to the web, broadcast and many others.

  • Orlando Premiere Pro Training Classes

After Effects Training Classes

Adobe After Effects is the industry-standard tool for video compositing, motion graphics design, and animation. It is used in the post-production process of film making and television production and can be used for keying, tracking, compositing and animation. After Effects also comes with a 3D engine that can be used to create three dimensional objects and worlds.

  • Orlando After Effects Training Classes

Photoshop Training Classes

Adobe Photoshop is gold standard in digital imaging, and an essential tool for photographers, graphic designers, web designers and anyone else looking to get the most of their images. Photoshop is packed with powerful features that will make your images shine, and has the ability to edit video and create 3D graphics as well.

  • Orlando Photoshop Training Classes

Dreamweaver Training Classes

Create, manage and publish websites with confidence. Craft your HTML and CSS visually or in code. Test your website in multiple browsers and across mobile devices and tablets. Manage menus, footers, sidebars, and styles across your entire website with ease. Dreamweaver’s powerful features will turn you into a true webmaster.

  • Orlando Dreamweaver Training Classes

Web Development Training Classes

Start with HTML and CSS, the building blocks of the web. Learn how to write standards compliant code to structure and format your content, including text, images, tables, lists, menus, hyperlinks and more. Then take your website to the next level by making it mobile responsive, adding forms, and making the pages interactive.

  • Orlando Web Development Training Classes

WordPress Training Classes

One of the world’s most popular content management systems (CMS) for both websites and blogs. It has never been easier to launch a fully functional website or blog in just hours and add advanced features such as a search box, contact forms, drop-down menus, image galleries, shopping carts and much more. WordPress is easy to install, highly customizable, and visually intuitive. No coding required!

  • Orlando WordPress Training Classes

© Copyright Web Guru. All Right Reserved
Website by Devi Studios
Back To Top