A lot of people don’t realize how quick and easy it is to synchronize your audio inside of Premiere Pro. In order to edit your video, your audio has to be synchronized first. This tutorial will show you how in just a few short steps.
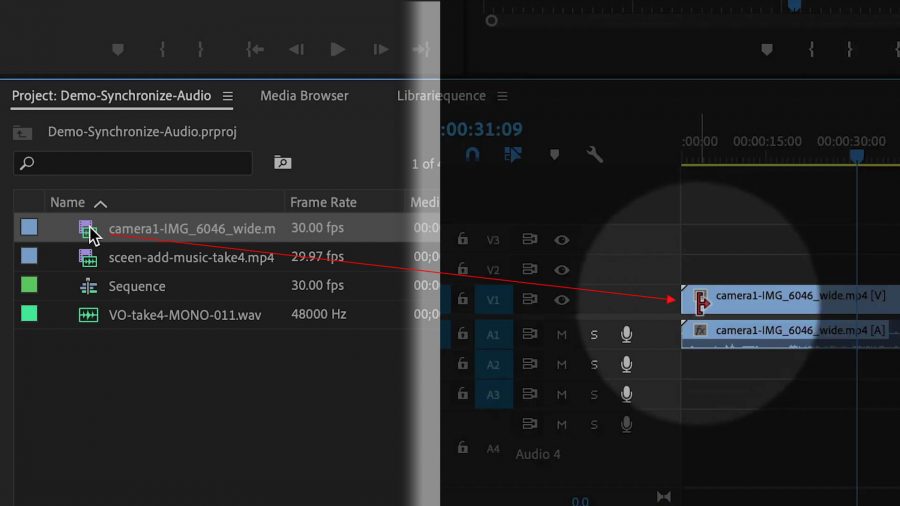
After your files are imported to Adobe Premiere, you can see them in the Projects Panel.
Drag each clip from the Projects Panel to a separate track in the Timeline.
Synchronize Audio
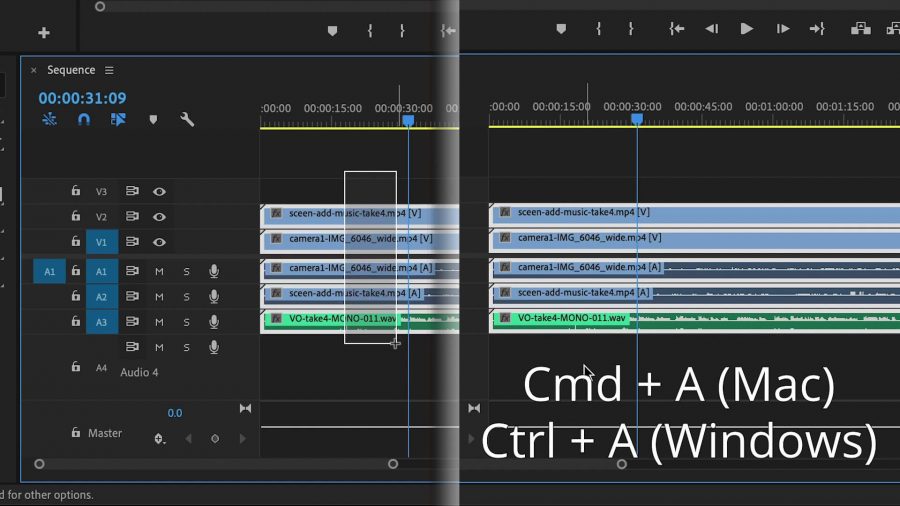
Select All by dragging over all the tracks, or Cmd A (Mac) or Ctrl-A (Windows)
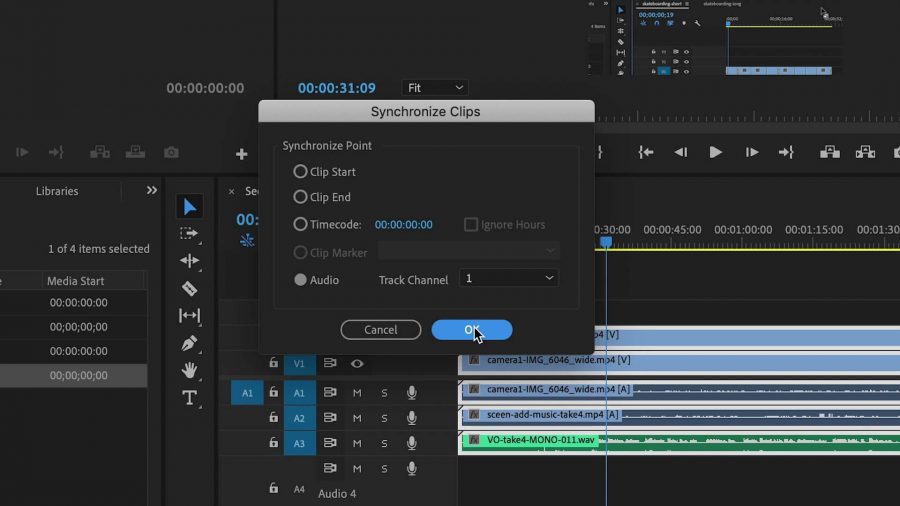
- Right-click over the tracks
- Choose Synchronize

- Choose Option Audio Track Channel 1
Note: For this to work, every clip has to have audio and all your files need to be on separate tracks.
Checking Synchrony and Make Final Adjustments
- Click the Wrench Icon
- Choose Expand All Tracks

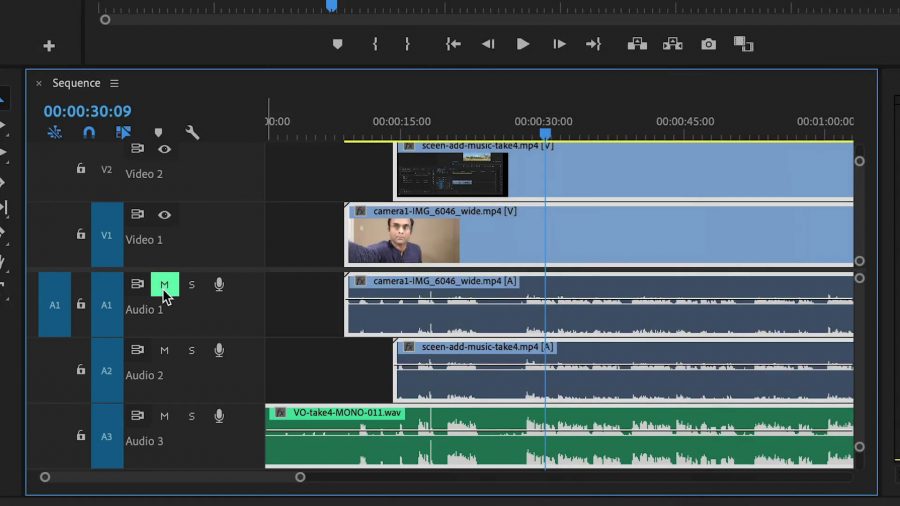
- Zoom in and notice that the audio waveforms are all lined up with each other. You can also listen and hear that the audio is synchronized.

- Click on the M to mute audio on your other tracks, so that only the main audio track will be heard.
Note: Audio tracks associated with your video files are called Scratch tracks. Some people will delete them. But it’s a good idea to keep them in case something goes wrong and you have to figure out what happened.
Now you can move on to edit your video. If you like this tutorial, subscribe to my YouTube channel for more great time-saving tutorials.


 Premiere Pro Training Classes
 After Effects Training Classes
 Photoshop Training Classes
 Dreamweaver Training Classes
 Web Development Training Classes
 WordPress Training Classes