Premiere Pro has a lot of transitions, but no way to preview them. In this video I’ll show you all of them in 2 minutes!
List of Transitions
This video contains examples of the following transitions:
- Cross Dissolve
- Dip to Black
- Dip to White
- Additive Dissolve
- Non-Additive Dissolve
- Film Dissolve
- Wipe
- Barn Doors
- Gradient Wipe
- Inset
- Push
- Slide
- Split
- Center Split
- Page Peel
- Page Turn
- Iris Round
- Iris Box
- Iris Cross
- Iris Diamond
- Cube Spin
- Flip Over
- Cross Zoom
The Morph Cut was excluded because that functions more like an effect rather than a transition. And all transitions in the Immersive Video folder were also excluded because those are meant for 360 footage.

How to Apply a Video Transition in Premiere Pro
For those who are new to transitions in Premiere Pro, here is a quick guide on how to add them:
- Go to the Effects panel by choosing Window > Effects from the top menu bar.
- Open the Video Transitions folder.
- Open any of the folders to find the transition you’re looking for. Some of the most common ones are found in the Dissolve folder.
- Drag and drop the transition into the Timeline at the edit between two clips. Most of the time you will want the transition to be centered between the two clips.
- If you wish to change the duration of the transition, double-click it and adjust the duration value.
Tips and Tricks
- Use the keyboard shortcut Cmd-D (Mac) or Ctrl-D (Windows) to apply the default transition in the Timeline. For this to work, you should either select a clip or several clips. Or the Playhead should be at an edit point between two clips.
- The default transition is the Cross Dissolve. You can change the default to any transition by right-clicking it in the Effects panel and choosing Set as Default Transition.
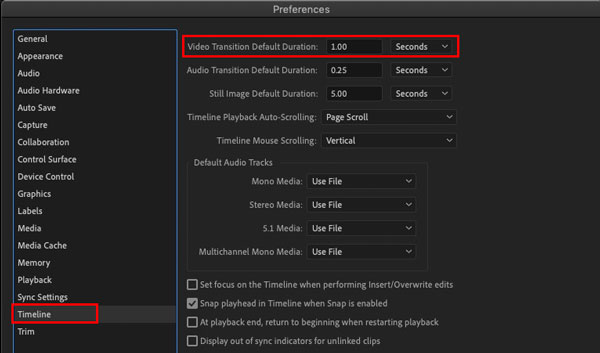
- The default transition duration is 1 second. To change this choose Premiere Pro > Preferences (Mac) or Edit > Preferences (Windows) then go to Timeline and change the Video Transition Default Duration.
- You can further refine a transition by selecting it in the Timeline and then going to the Effect Controls panel.
Further Reading
- Subscribe to the Web Guru’s YouTube channel by clicking here!
- Watch more videos by the Web Guru.
- Learn how to edit professional videos with Adobe Premiere Pro Training Classes


 Premiere Pro Training Classes
 After Effects Training Classes
 Photoshop Training Classes
 Dreamweaver Training Classes
 Web Development Training Classes
 WordPress Training Classes