In this tutorial, I will show you how to apply the Ken Burns effect to your slide presentations in Premiere Pro.
Of course, your first questions will be Who is Ken Burns? and what does he have to do with Premiere Pro effects?

Ken Burns is a filmmaker who used the effect of panning and zooming on still images. He did not invent the effect, but he used it enough for other video production artists to name the effect after him. A great example of his work is the documentary called The Civil War, which I highly recommend.
Import Images
- Import the images for your slide show by choosing File > Import from the top menu.
- Create a new sequence File > New > Sequence.
- Set up your sequence presets. I use Digital SLR 1080 P and 110 80 p 30 frames per second, but you use whatever you would like to achieve the results that you desire. These settings will create a video that is 1920 x 1080.
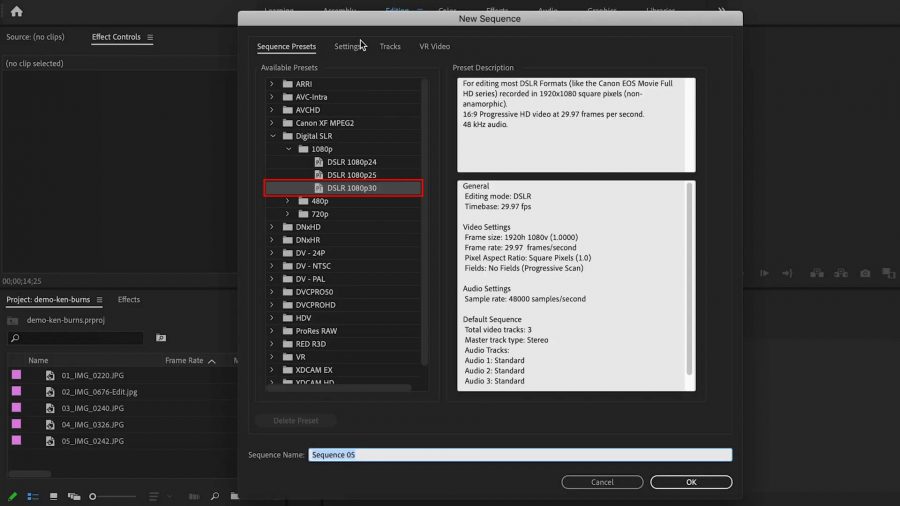
- Rename the Sequence.
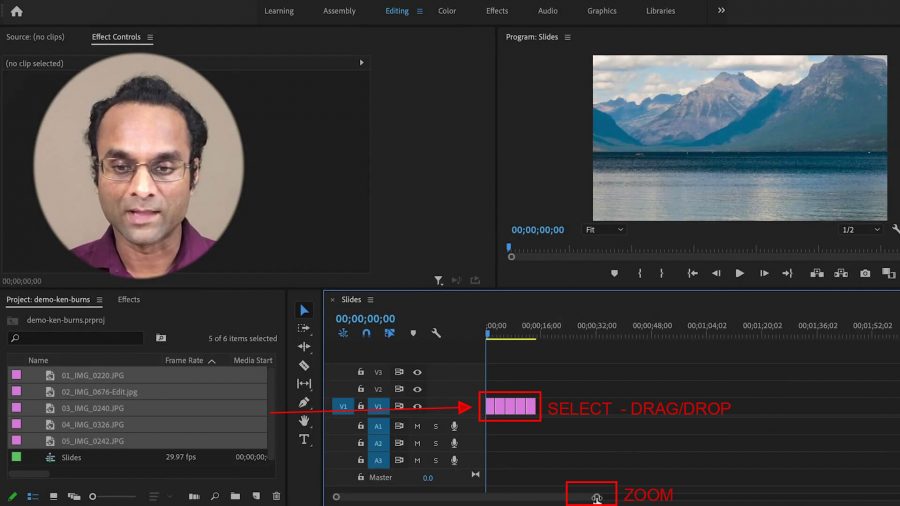
- Select all the images by clicking on the first image then Shift-Click the last to select them all.
- Add the images to the timeline, by Dragging them all to the timeline.
- If necessary, adjust the zoom on the timeline so that you can see the images better.
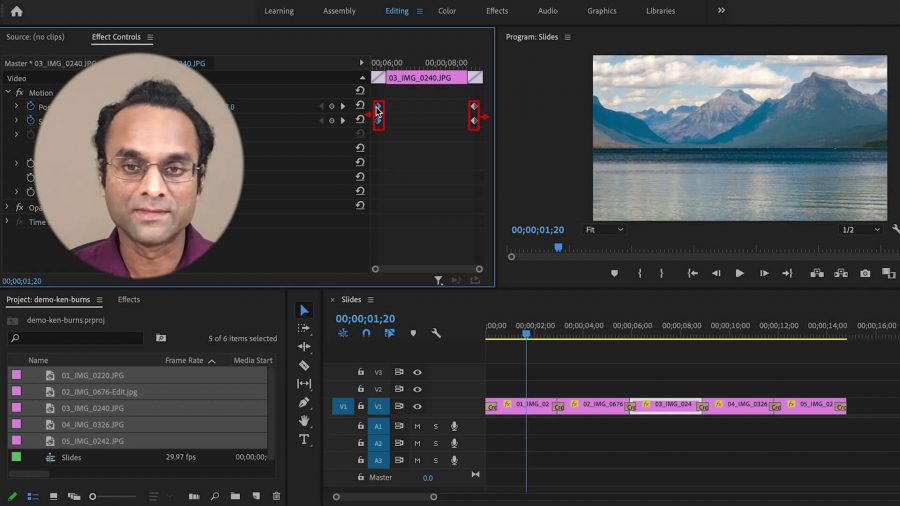
- Make Effects Control panel available – Windows > Effect Controls
- In the Effect Controls panel – Change scale values for each image to make them fit the screen. (Either do this step now for each or do this step before you begin applying effects on each image.)
Animating Scale Property (Zoom)
- Select Clip in the Timeline.
- Slide playhead to the beginning of the clip.
- Click Toggle Scale Animation Button (looks like a Stopwatch). The first keyframe is created.
- Click later into the clip.
- Increase the scale value. The second keyframe is created.
- Move the second keyframe to the very end of the clip.
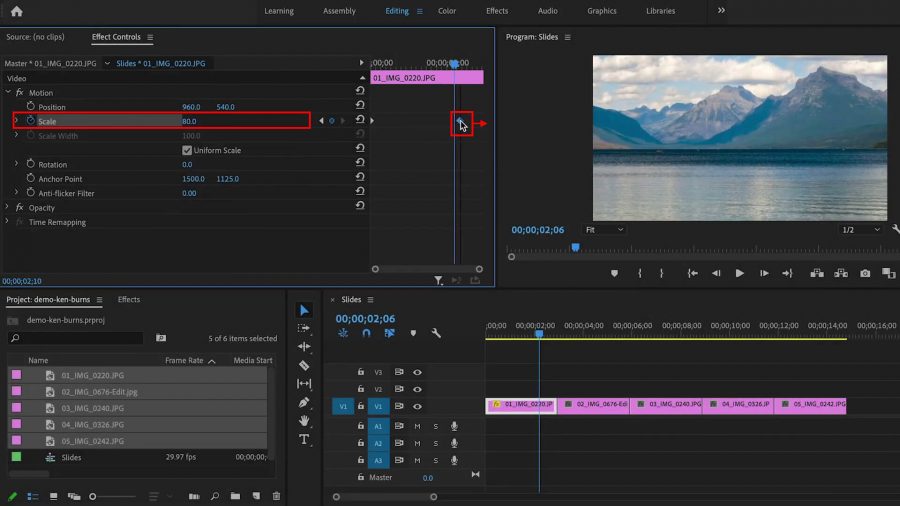
This creates a smooth zoom animation through the entire clip.
Animating Position Property (Pan)
- Select Clip in the timeline.
- Slide playhead to the beginning of the clip.
- Click Toggle Position Animation Button. The first keyframe is created.
- Adjust the image to the position you want it to appear when it fades in.
- Click later into the clip.
- Adjust the position value to where you want the image to be, before it fades to next image. The second keyframe is created.
- Slide the second keyframe to the end.

This creates a smooth pan animation over the image.
Animating Scale And Position Property (Zoom and Pan)
- Select Clip in the timeline.
- Slide playhead to the beginning of the clip.
- Click Toggle Scale and Position Animation Buttons. The first keyframe is created.
- Adjust the image to both the position and the scale that you want it to appear when it fades in.
- Click later into the clip.
- Adjust the position value and the scale value to where you want the image to be, before it fades to next image. The second keyframe is created.
- Select and slide both keyframes to the end.

This creates a smooth zoom and pan animation of your image.
Copying Animation Properties
Frequently, I am asked if there is a preset to help speed up this process since this is a bit time-consuming. There is not, but you can copy the keyframes from one image to another which helps save time.
- Select Clip that holds the keyframes you would like to copy.
- Go to Edit > Copy
- Select Clip that you want to apply the keyframes.
- Go to Edit > Paste Attributes. Be sure Motion Attributes is selected.
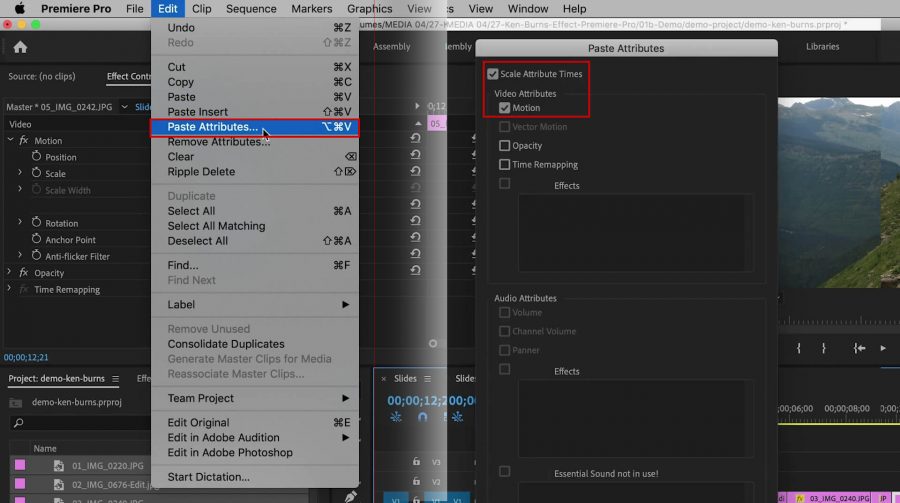
- Click OK.
You should see the copied keyframes applied to the image.
Applying Transitions
Finally, a professional slide presentation should also have nice smooth transitions. In the case of the Ken Burns Effect, the transition should be a smooth fade between images.
- Select all the clips.
- Go to Sequence > Apply Video Transition
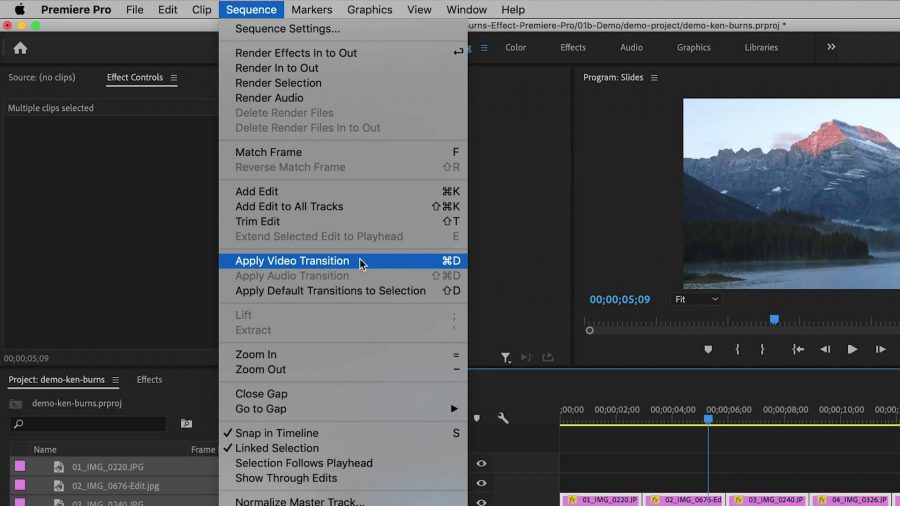
Now there should be a nice transition from one image to another. If anything appears odd in the transitions, like choppiness, then go to each clip and drag the keyframes out as far as you can.
As you can see, this is not difficult, and it is a bit time consuming, but the results will make your slideshows look professional and much more interesting and visually engaging.
Let me know if this has been helpful to you or if you have any questions, feel free to contact me.
Subscribe to my YouTube channel for more helpful hints in photography, videography and Premiere Pro.


 Premiere Pro Training Classes
 After Effects Training Classes
 Photoshop Training Classes
 Dreamweaver Training Classes
 Web Development Training Classes
 WordPress Training Classes