To enhance the creativity of a video, or provide graphic features, many times files can be created in Adobe Photoshop and then imported into Adobe Premiere Pro. The procedure is easy, here’s how:
1. Import your .PSD file:
- From Premiere Pro choose File > Import from the top menu and browse to your Photoshop file.
- Double click the file or select it and then choose the Import button.

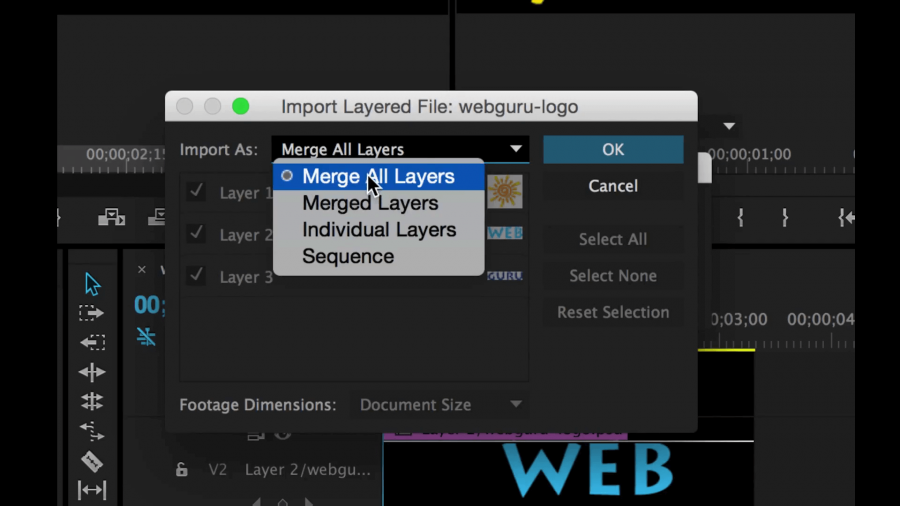
2. Choose from 4 options in the dialog box
- Merge all Layers – will import all layers flattened into one clip
- Merged Layers – will import chosen layers flattened into one clip
- Individual Layers – chosen layers will be imported as separate clips
- Sequence – layers will be imported as separate clips, and also will combine them into a sequence
The first two options are clear, but it gets more interesting when you move to Individual Layers.
Individual Layers:
When you choose this option, all layers will be imported as separate clips that you will find in a folder (or bin) inside your project panel. When you open the folder you will see each layer as a separate clip.
Hint: When you create your Photoshop files, be sure to have a transparent background, if you want to float them over other images. Transparent backgrounds will show as black in your source monitor.

Sequence:
If you choose the last option, you will open your folder (or bin) and you will find the clips like before, but also, there will be a sequence. Double click the sequence to open it. You will see the individual layers in your timeline and the images will show in your program monitor. You can hide and show each layer by clicking the eye symbol next to the layer in your timeline.

Now you can apply effects as you wish.


 Premiere Pro Training Classes
 After Effects Training Classes
 Photoshop Training Classes
 Dreamweaver Training Classes
 Web Development Training Classes
 WordPress Training Classes