This tutorial will show you the best settings for exporting a video for YouTube, from Adobe Premiere Pro.
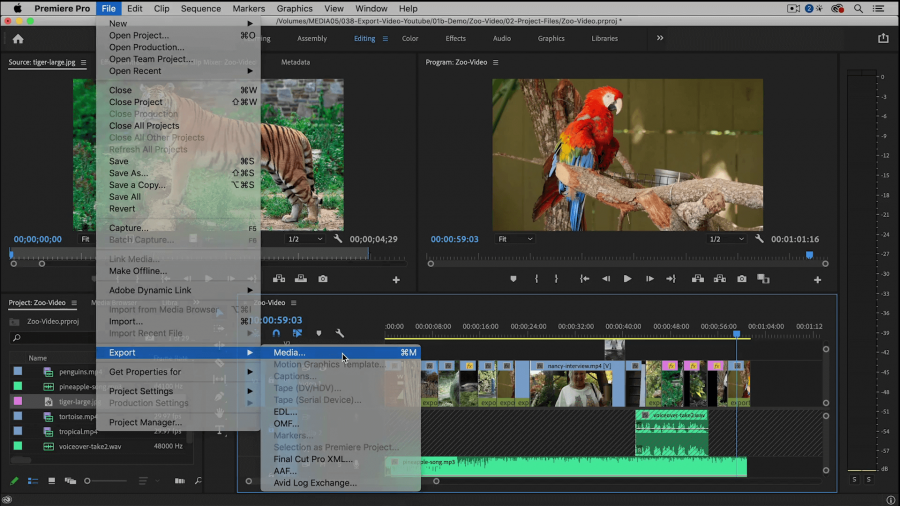
Export Dialog Box
- Click anywhere inside the Timeline.
- From the top menu choose File > Export Media.
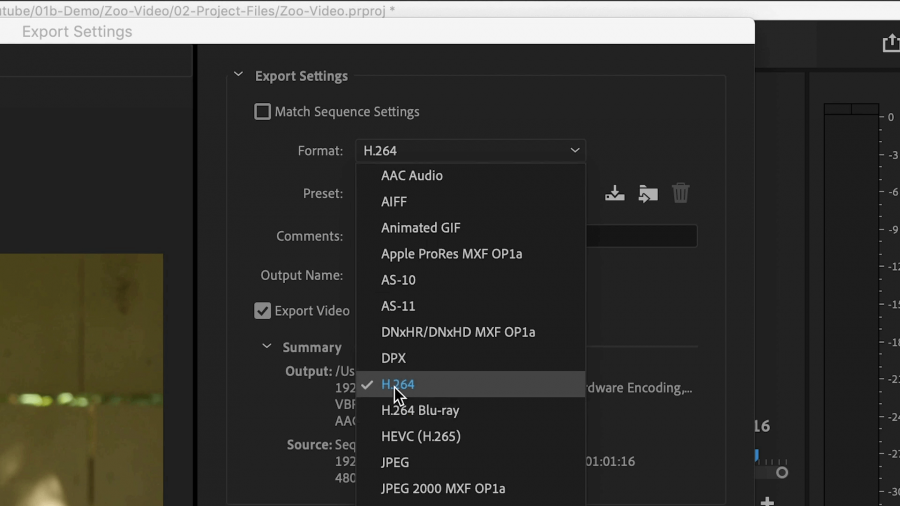
Preparing The Export
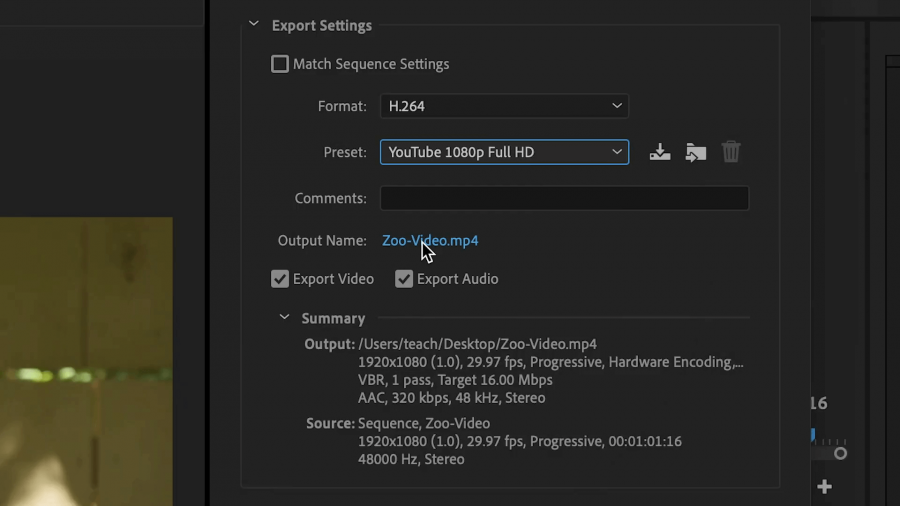
- Click on Format Menu.
- Choose H.264. This is the most popular form of compression used across social media. It will create an mp4 file.
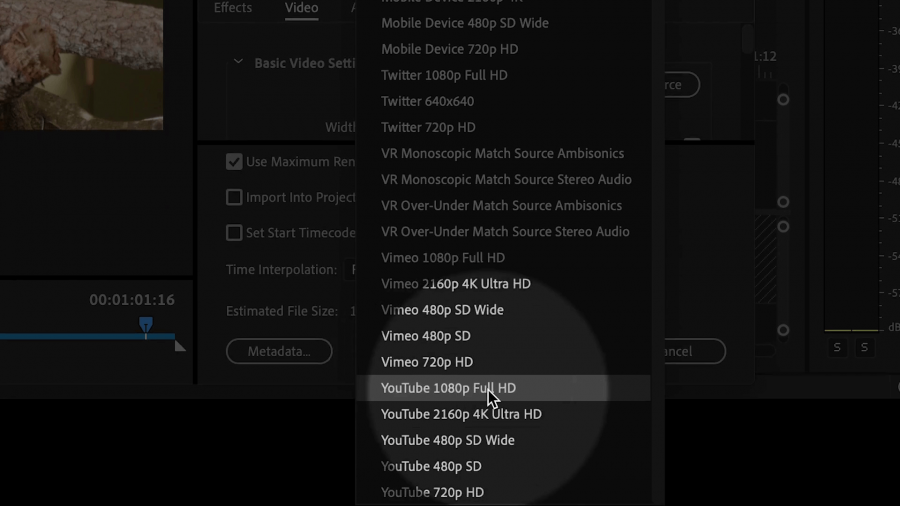
- Click Preset Menu.
- Look for the YouTube presets, and choose the one that best matches your video resolution.
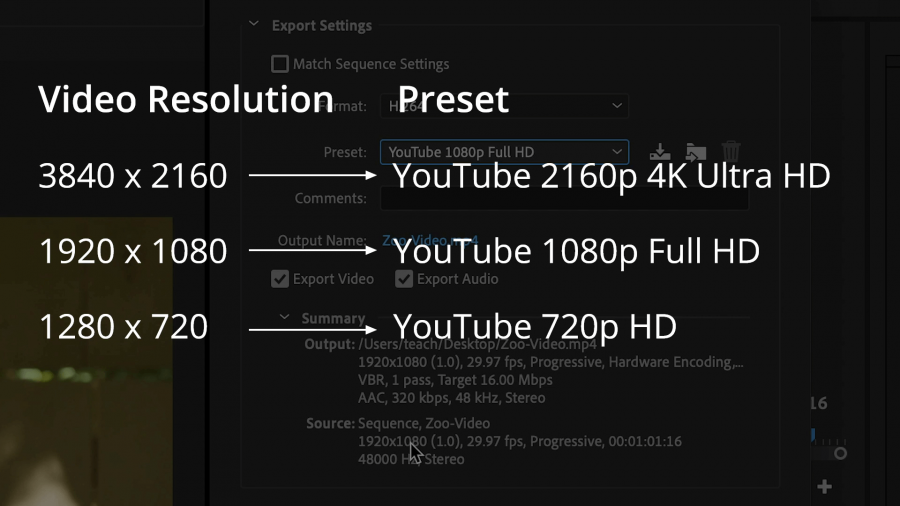
Find Video Resolution
If you are uncertain about your video resolution, look in the Summary Box, under Source Video, you will see the resolution of the videos you used. Example: 1920 x 1080 pixels.
- Choose the preset that matches the second number. Example: 1080p Full HD
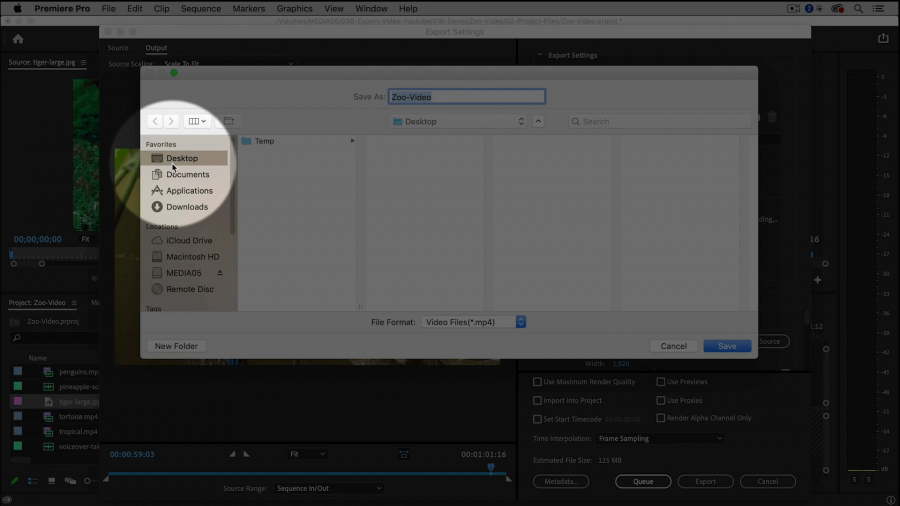
Set File Destination
- Click on output name. (highlighted in blue)
- Choose the folder in the location that you want it saved
- Check the Maximum Render Quality box.
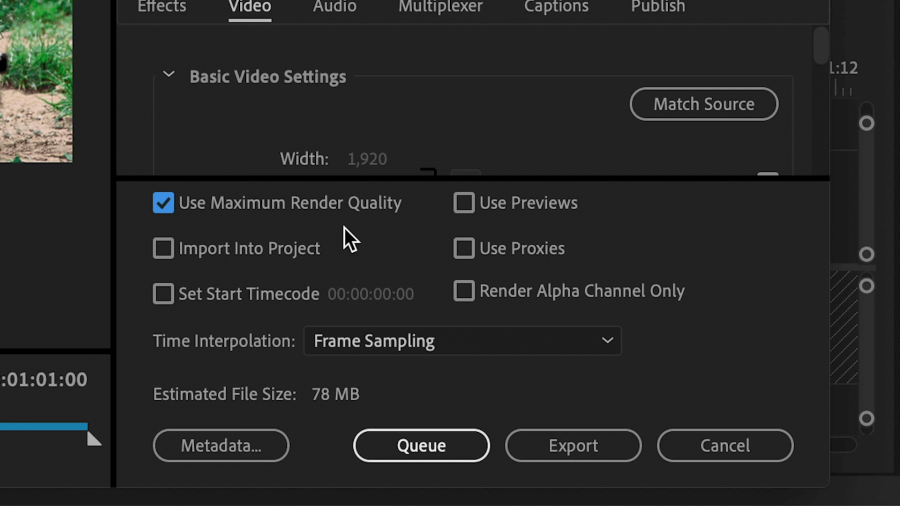
Note: Maximum Render Quality will increase the length of export time.
Finding, Using And Sharing The Video
- Open your hard drive file system.
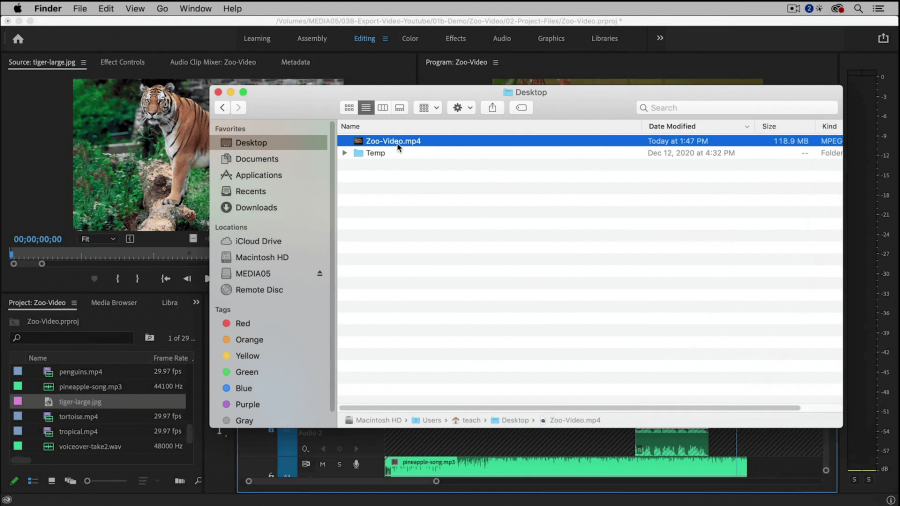
- Find the file where you saved the video.
- Double-click on it to view it immediately.
- Now you can upload this file to any social media site such as Facebook, Twitter or YouTube. Or embed it into your website!
If this tutorial is helpful to you, please leave a comment or feel free to ask questions. If you would like to keep up to date on my tutorials, please subscribe to my YouTube channel.
Keep learning and growing!


 Premiere Pro Training Classes
 After Effects Training Classes
 Photoshop Training Classes
 Dreamweaver Training Classes
 Web Development Training Classes
 WordPress Training Classes