Have you ever wanted to convert vertical videos to square or horizontal videos. Or horizontal videos to square or vertical? This tutorial will show you how to do this in Adobe Premiere Pro.
Create a Sequence
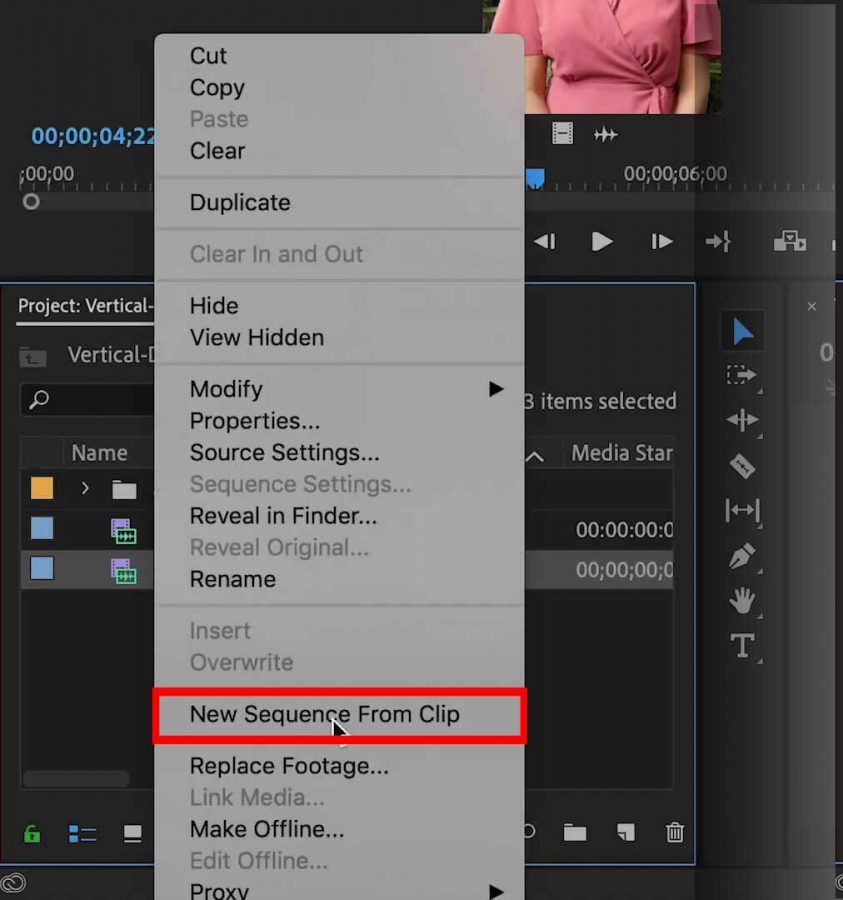
- Import your video clip and you will see it in the Project Panel.
- Right Click the clip and choose New Sequence From Clip which creates a sequence with the clip inside of it.
- Rename the sequence with a descriptive name such as video-vertical or video-horizontal (Note: all clips should have descriptive names in Premiere Pro).
- You should indicate whether the sequence is vertical or horizontal in the name to prevent confusion.
Clip vs. Sequence
In the Project Panel you will see clips and sequences. What is the difference? A clip is your raw source video clip, exactly as you imported it. A sequence is your edited video. The best way to recognize them is by their icons in list view:

Sequence Settings
- Right Click the Sequence in the Project Panel
- Choose Sequence Settings to view the properties.
- Find Frame Size and notice the Aspect Ratio (which is automatically calculated by Premiere Pro). The example here is a vertical video:

- Click OK.
Typical Frame Size Dimensions

Vertical To Square
- In the Project Panel right-click the vertical sequence and choose Duplicate.
- Rename the vertical sequence to video-square or similar.
- Double Click the sequence to open it in the Timeline.
- Right-click the sequence and go to Sequence Settings.
- Change height to 1080 pixels. Notice Aspect Ratio changes to 1:1.
- Click OK.
- Notice the video is now square and the top and bottom are cropped.
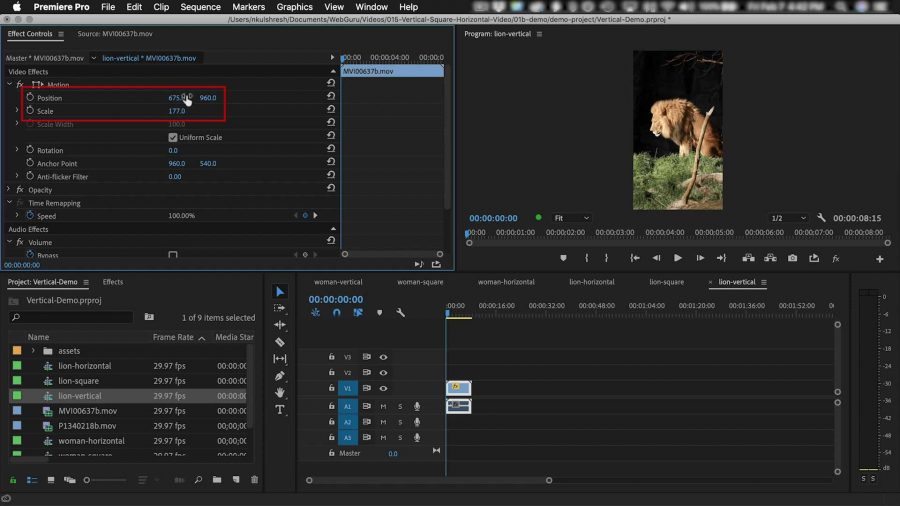
- To change the position of the video, for a better appearance:
- Select the Clip
- Choose Window>Effect Controls from the top menu.

-
- Change the position of the video inside the frame.
Convert Square To Horizontal
- In the Project Panel right-click the square sequence and choose Duplicate.
- Rename the square sequence to video-horizontal or similar.
- Double Click the sequence to open it in the Timeline.
- Right-click the sequence and go to Sequence Settings.
- Change width to 1920 pixels. This adds extra space on the left and right, appearing as empty black bars.
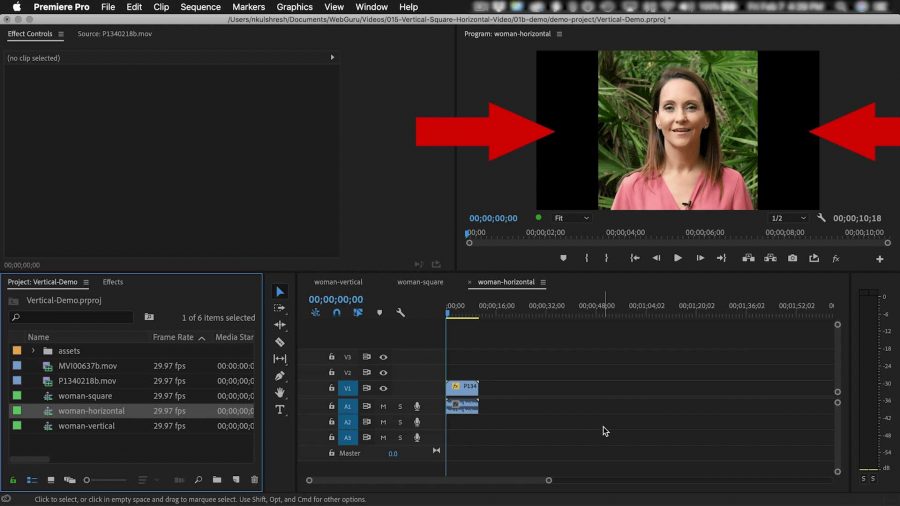
Fill Black Bars
You can leave the black bars or you can fill them with a graphic or colored background or use one of my favorite tricks as follows:
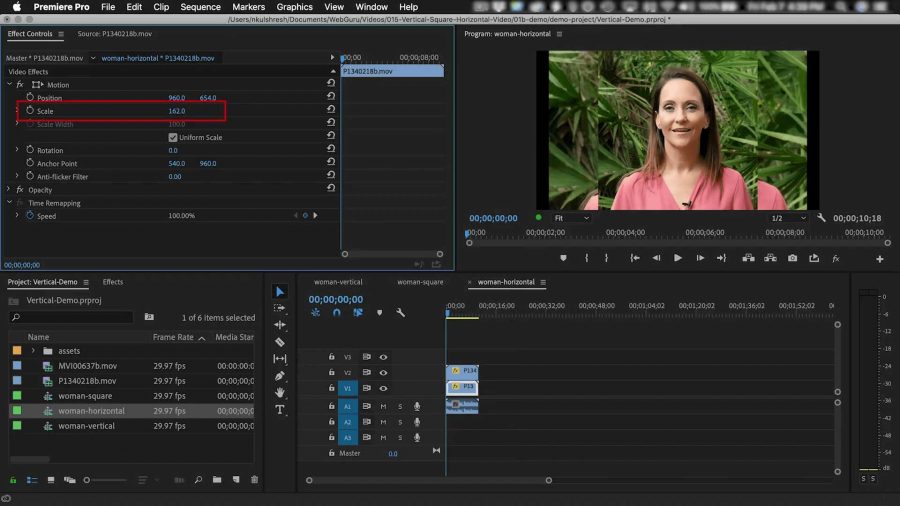
- Opt-Drag (Mac) or Alt-Drag (Windows) to duplicate the clip to another track above it, layering the video on top of itself.
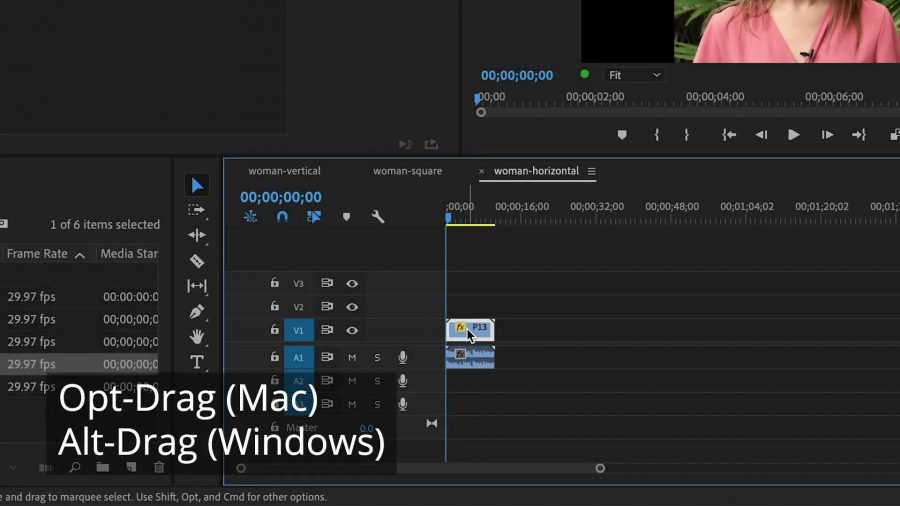
- In the timeline, select the Track 1 clip, Choose Window>Effect Controls from the top menu and increase the scale until it fills the frame, hiding all the empty black area.
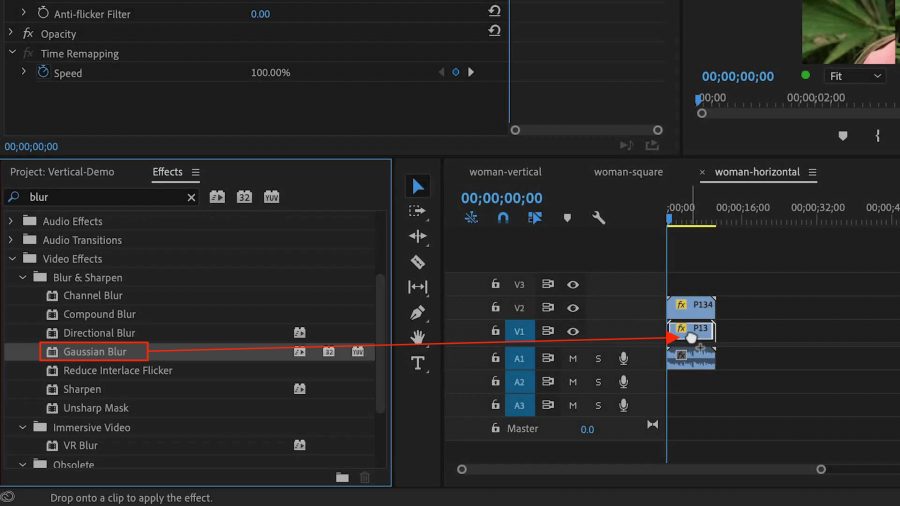
- Keep the clip selected, go to Window>Effects, and type Blur into the search box, which reveals all the blur effects.
- Choose Gaussian Blur by dragging it and releasing it onto the clip in the Timeline.
- Go to the Effect Controls panel and increase Blur until you are satisfied with the appearance.
Horizontal To Square
What if you start with a horizontal (landscape) video and need to convert it to square? Read on!
- Duplicate and Rename the Horizontal Clip to descriptive word-horizontal.
- Double Click to open and go to Sequence Settings.
- Change width to 1080 pixels (or to match the height). Notice Aspect Ratio changes to 1:1.
- Click OK and then if asked to Click OK again.
- Notice the left and right of the video is cropped.
- To change the position of the video, for a better appearance:
- Select the Clip
- On the top menu, Choose Window>Effect Controls, then change the position of the video inside the frame.
Square to Vertical
- Duplicate and Rename the Square Clip to descriptive word-Vertical
- Double Click to open and go to Sequence Settings.
- Change the height to 1920 pixels.
- Click OK and then if asked to Click OK again.
- Choose Window>Effect Controls, then change the scale and the position of the video inside the frame.
Export Individual Sequences
- Select a sequence.
- Choose File>Export Media.
- Select the most common format, which is H.264 and a good preset is Match Source High Bitrate.
- Click on File Name and choose the export location.
- Click Export.

I hope this tutorial is helpful to make you a more efficient video editor using Adobe Premiere Pro. Please subscribe to my YouTube channel for more great tutorials and resources.


 Premiere Pro Training Classes
 After Effects Training Classes
 Photoshop Training Classes
 Dreamweaver Training Classes
 Web Development Training Classes
 WordPress Training Classes