We’re going to talk about adding text to a video to make it more interesting, by providing descriptions as well as adding personal information like website and social media information at the end. It’s actually pretty easy to add text in Adobe Premiere Pro.
Add Text:
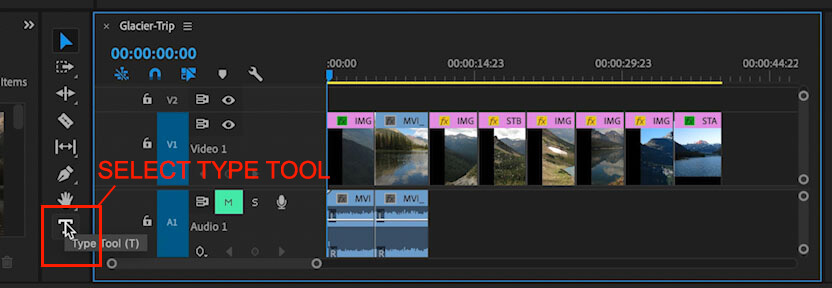
- Find the Type Tool at the bottom of the Tools Panel – it looks like a T.
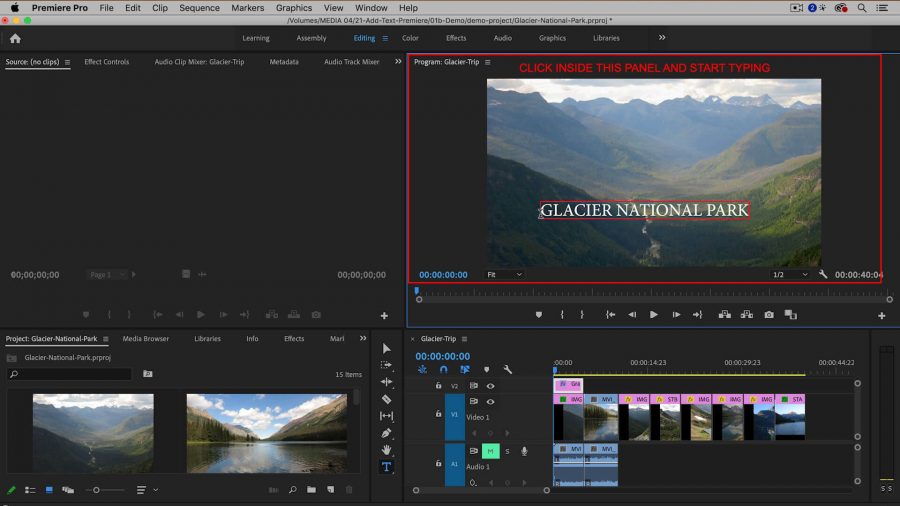
- Click anywhere in the Program Monitor and start typing.
- Move text – go back to the Selection Tool.
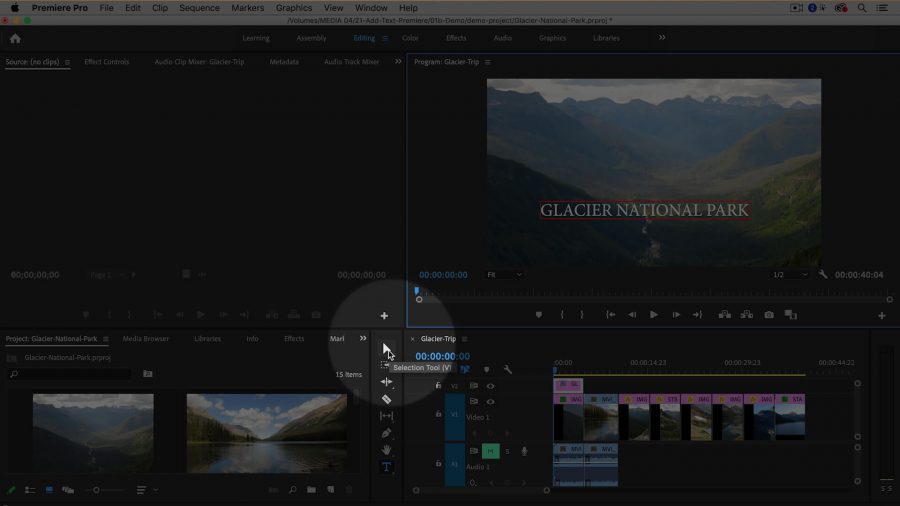
- Click and drag the text to another part of the screen.
Change the font and the size and other properties
- Go to Essential Graphics Panel. (It’s relatively new inside of Premiere Pro) To show the Essential Graphics Panel, you’ll want to go up to the Window menu and then choose Essential Graphics. It will open on the right side of the screen.

When you create text inside of Premiere Pro, it will automatically create a clip this is called a graphic clip that contains the text in your timeline. That all happened automatically. When you go to the Essential Graphics Panel, you’ll want to make sure that you select the clip you want to edit.
The Essential Graphics Panel is separated into two tabs you have Browse and Edit.
Click Edit.
Here are some of the most important properties.
- Choose or Find Your Font.
-
- Underneath the Text tool is Font.
- Every single font that you have installed on your system will be in this drop-down menu. If you know which font you’re looking for a little shortcut is to start typing it in, and then it will filter for you.
- Align the text.
-
-
- Left, Right or Center – if it goes off the screen, you can use your Selection tool to click and drag it back into correct placement
-
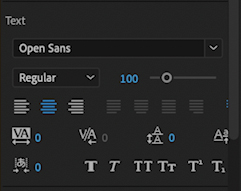 Change the size of the text.
-
- Use the slider or type in a value.
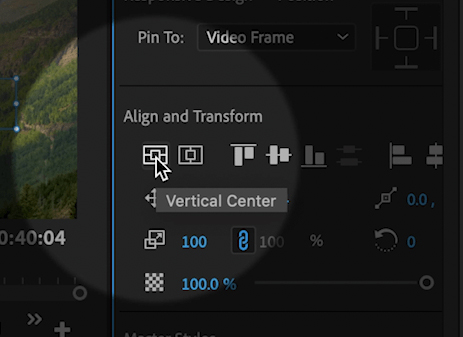
- Alignment Transform.
-
- Choose Vertical Center or Horizontal Center
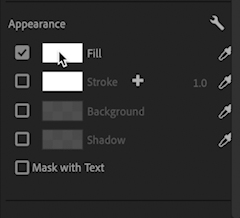
- Appearance
-
-
- Change color of text- fill color, stroke (outline) color
- Add Shadow
- Add Background color
-
Make text more readable
- Make Text Color lighter or darker depending on the background
- Add Stroke (outline) of same color or give font a different color outline
- Add Drop Shadow so the text stands out more
- Add Background Color to help make text clearer and more readable
Timing of Text Appearance
- When text is created the text clip will default to five seconds, increase or decrease the time of appearance by dragging the edges of the graphic clip. To make it longer drag it outward, to shorten it drag it inward.
Creating a “Lower Third”
Lower Third is text that appears in the bottom third of the screen, this is usually a person’s name or additional information that is useful to the watcher.
- Select Type Tool (bottom of Tools Panel).
- Click in the Program Monitor and type.
- Using the Appearance feature, correct and adjust the font.
- Return to Selection Tool, move text down to bottom of screen.
- Add another line of text underneath, adjusting appearance accordingly.
- Find the default 5-second clip in the timeline. When you view it in the Essential Graphics panel, there are two layers, each containing a line of text. Use the Eyeball icon to toggle the visibilty on and off, the same as in PhotoShop. This is very useful and gives more control.
Safe Margins:
- Right Click in the Program Monitor.
- Choose Option – Safe Margins, which will make boxes appear on the screen
- Move your text inside the boxes.
- Once you confirm your text is safely inside the Safe Margins you can toggle Safe Margins off.

Duplicate Text (to maintain properties):
- Opt-Drag or Alt-Drag text to new location
- Change text while maintaining all the same properties by selecting the Text Tool and carefully clicking in the existing text box (otherwise you create a new text box).
Tip:
- Undo any change you made use Cmd-Z or Ctrl-Z.
- Select All text in a clip use Cmd-A or Ctrl-A
- If you create a new text box by mistake, select the empty box in Essential Graphics Panel and Delete that layer.
Next, you will probably want to add transitions or simple animations. Look for my next video on how to animate your text to make your video more interesting.


 Premiere Pro Training Classes
 After Effects Training Classes
 Photoshop Training Classes
 Dreamweaver Training Classes
 Web Development Training Classes
 WordPress Training Classes