Renaming files one by one can be very time consuming, but batch renaming can be done almost instantly. This tutorial shows you how.
Before we start, be sure you are renaming your files before you import them into Adobe Premiere Pro. If you do it after, all your files will become disconnected and will be a big headache to fix.
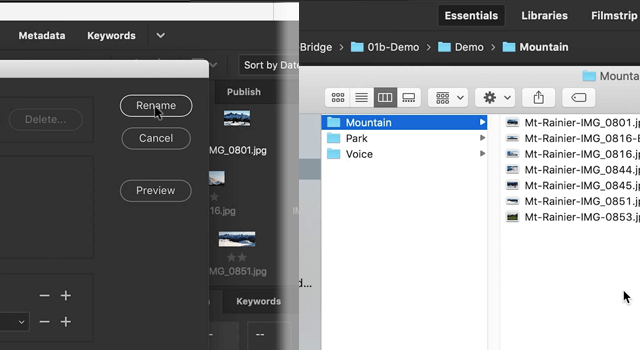
When you have a lot of similar files in one folder, it’s always good to have a common name, such as Camera One, Camera Two, or the name of a person or the place being featured in the video, image, or audio file.
Batch Renaming: The Basics
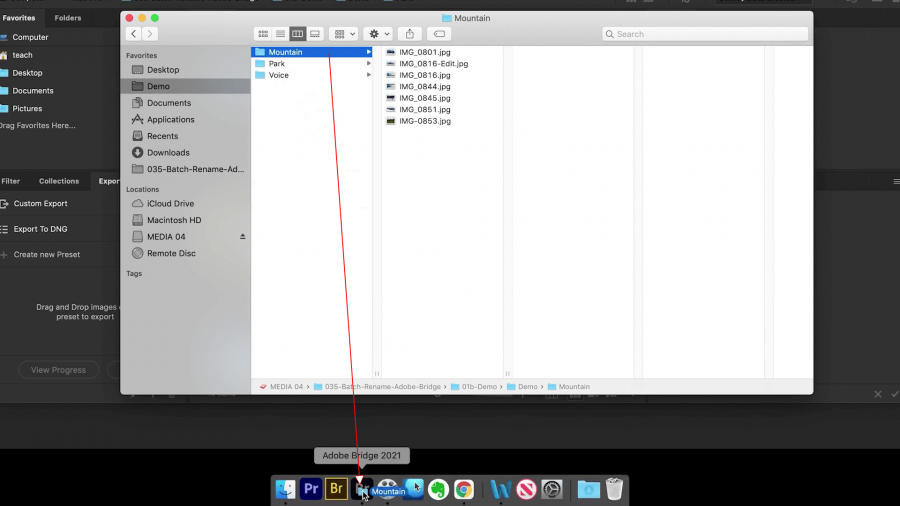
In your file navigator of Adobe Bridge:
- Choose the folder containing the files that you want to be renamed.
- Drag it down to the Adobe Bridge icon on the dock.
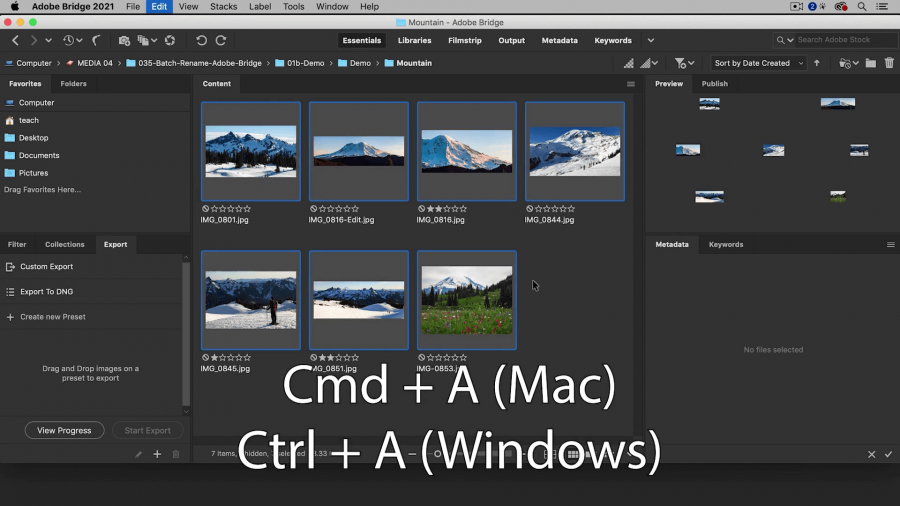
- The folder will open showing all files contained in it. Select all the files (Mac: Command A Windows: Cntrl-A).
- Choose Tools > Batch Rename.

Tip: You can rename in the same folder or choose to have the renamed files saved in a separate folder.
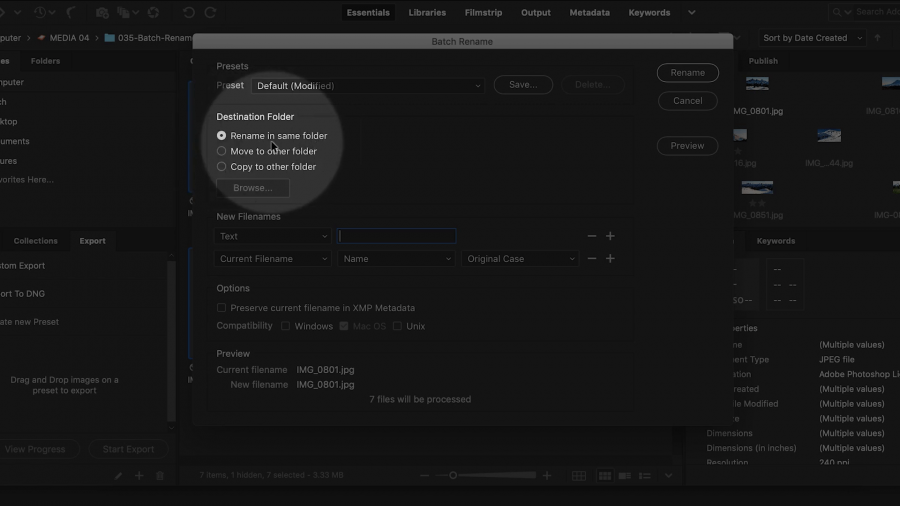
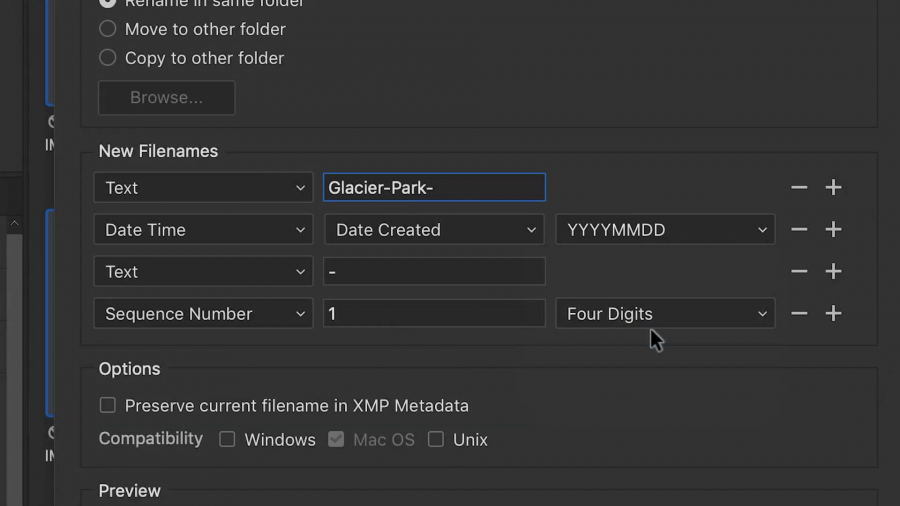
- Go to the first line of fields, choose the type of field you want to use, such as Text.
- In the next field, type your text ending with a dash or underscore.

- Look at the bottom, find the Current File Name, and beneath that the New File Name, if you are satisfied with the file name as you see it.
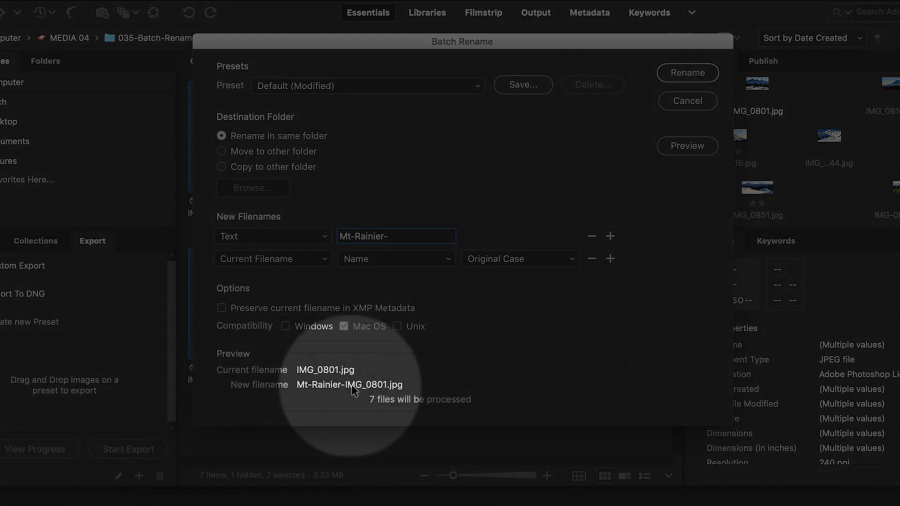
- Click Rename.
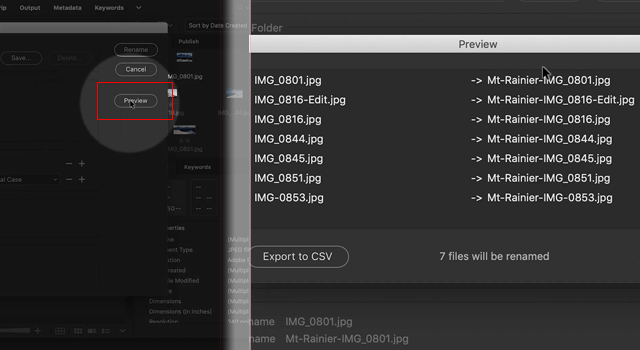
Tip: Before you click OK, you can also click on the Preview button to see what all the file names will look like.
Add Subtract And Edit Fields
- Add a field by clicking on the + sign at the end of the field rows, or subtract a field by clicking on the – sign.
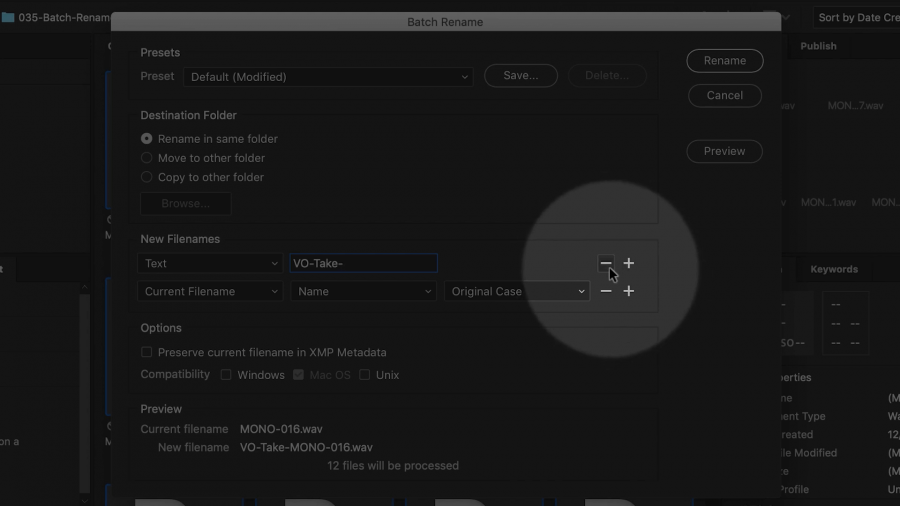
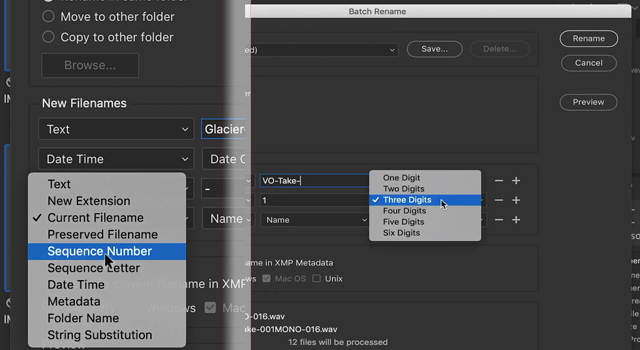
- Choose the type of field that you want, such as:
- Sequence – type in the starting number and choose the number of digits used per file name.
-
- Date – type in the format you desire for the date, such as yyyymmdd
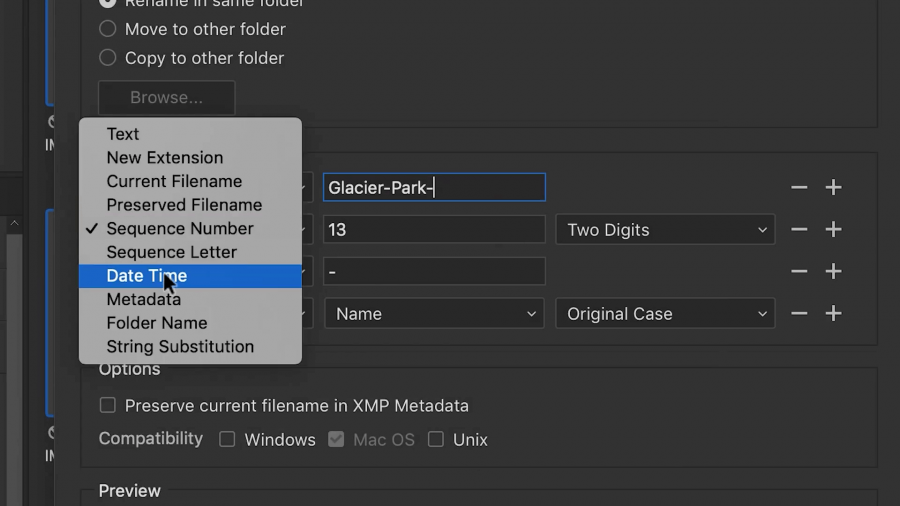
-
- Text – type any text you want or a dash or underscore as a separator.
- Observe the naming format at the bottom New File Name, until you are satisfied.
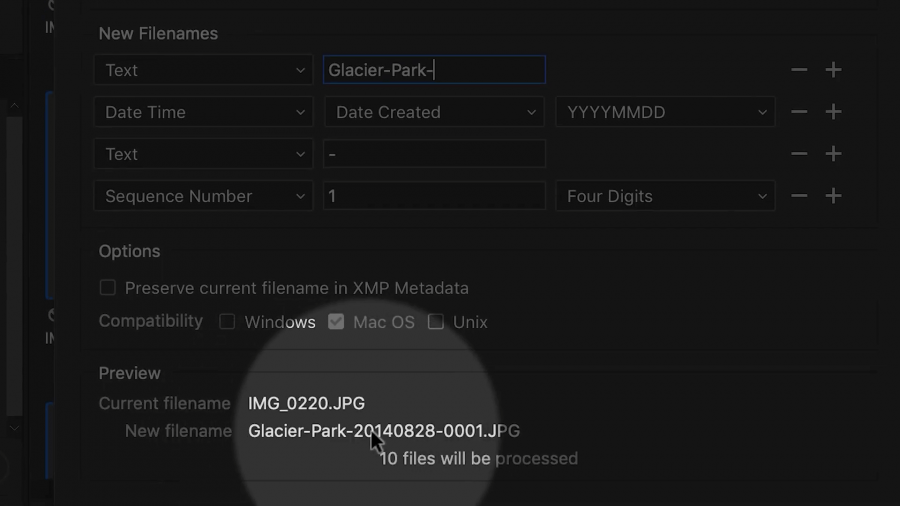
- Preview and/or click OK
Tip: A common naming convention for professional photographers is: location-date-sequence number.
And that’s it!
I hope you find this to be very helpful in saving time and increasing your organization of media files, to make working with Adobe Premiere Pro as efficient as possible.
For more time-saving videos, subscribe to my YouTube channel. Let me know if this has been helpful and ask any questions in my comments section.


 Premiere Pro Training Classes
 After Effects Training Classes
 Photoshop Training Classes
 Dreamweaver Training Classes
 Web Development Training Classes
 WordPress Training Classes