Audio is as important and sometimes even more important than video. In this tutorial, I am teaching you how to get perfect levels every time.
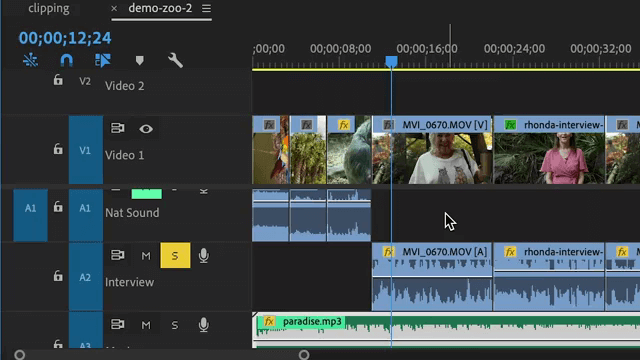
Organize: Name and Move Audio
Naming Tracks
- In the Timeline click on the Wrench icon
- Choose Expand All Tracks
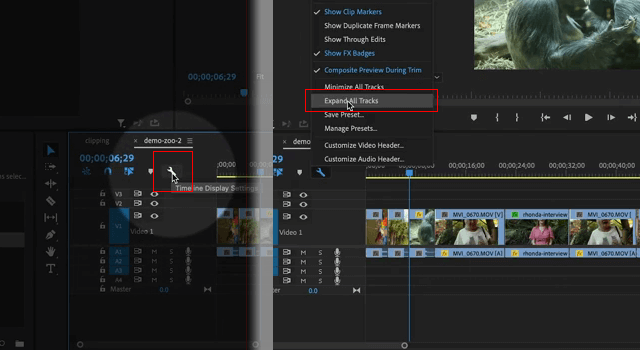
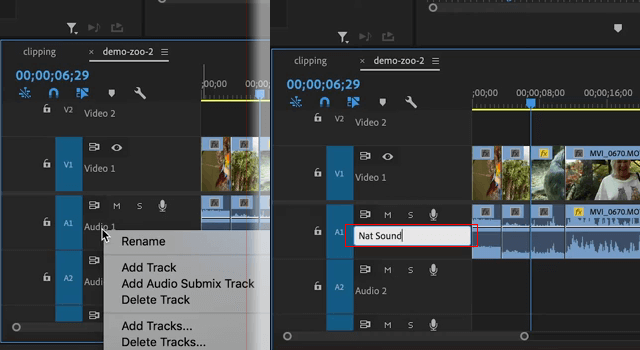
- Right-click default names (ex. Audio 1, Audio 2)
- Choose Rename
- Type in a descriptive name. Some common names for audio tracks are:
- Nat Sound
- Interviews
- Voice Over
- Music
- SFX (for Sound Effects)
- Each track should have a distinct purpose.
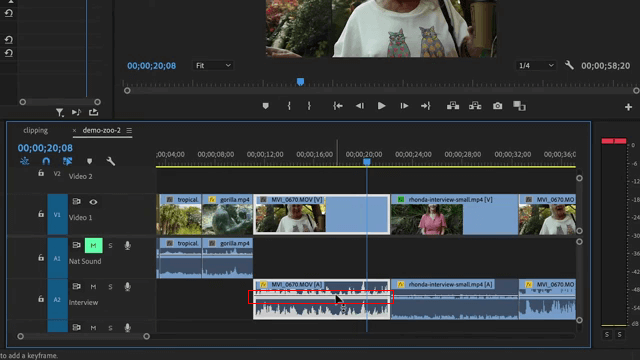
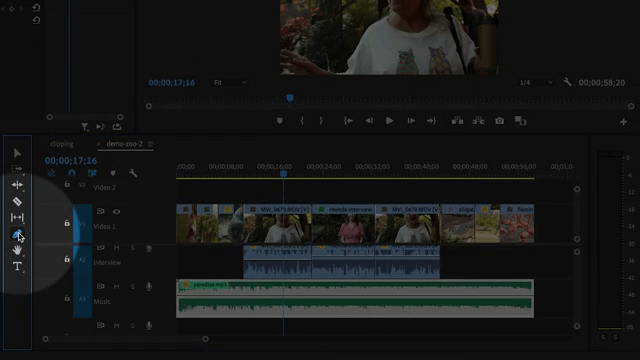
Move Audio
- Move Audio Clips to the Correct Tracks
- Click audio on the clip
- Drag down to the assigned track
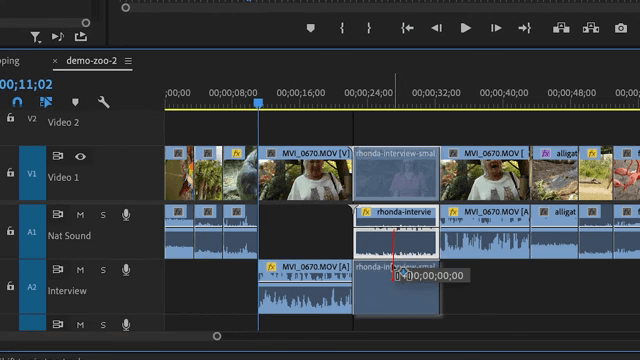
Note: Be sure to drag straight down to avoid being out of sync.
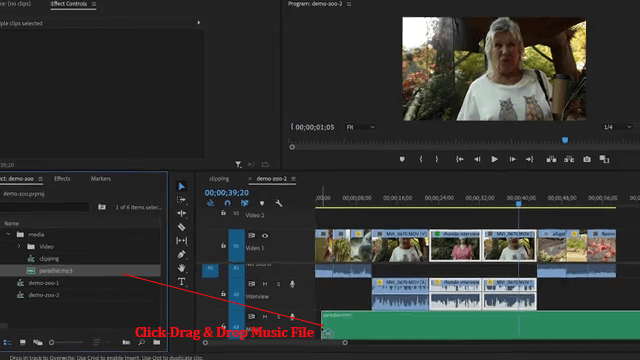
- Add Music
- Click audio clip in Project Panel
- Drag to the correct audio track in the Timeline.
Sound Levels
Audio Meter
- On the right side of your workspace, you will see a scale that lights up and bounces up and down with the sound when you play your clips. This scale is measuring the decibels (dB) of your sound clip.
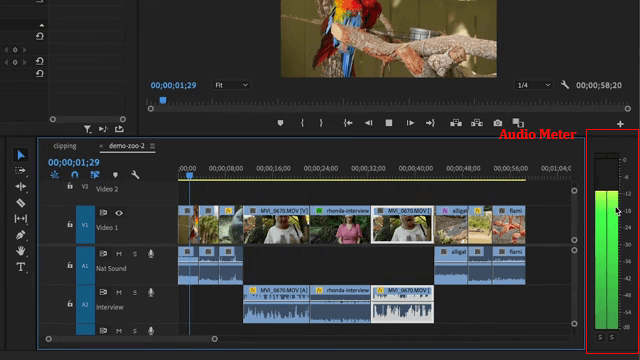
Decibels (dB)
- Decibels (dB) are the measure of sound. The decibel scale is in negative numbers, the highest level is 0.
Rules of Sound Levels:
- You cannot go above 0. Clipping occurs when the sound reaches beyond 0. (Clipping is when an amplifier is being pushed to its limit, causing it to go into overdrive.)
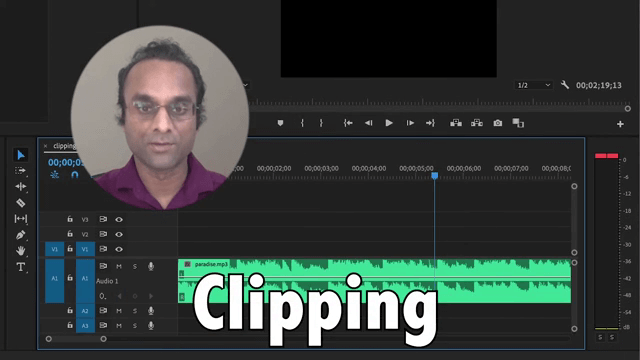
In Premiere Pro, when the sound jumps above 0, the red lights go on at the top of the audiometer, indicating that your audio is clipping.

- Suggested levels for various purposes:
- Levels for TV or Movies should go no higher than between -6 to -12
- YouTube, Social Media, or Personal use should go no higher than -3 or maybe just a little under 0
- Ambient music or sound should be less than dialog sound to avoid overpowering any voices
Adjusting Sound Levels On Audio Clips
Muting
- Find the M to the left of the clips on the track that you want to mute.
- Click on the M to mute the sound on that track.
Adjusting Volume
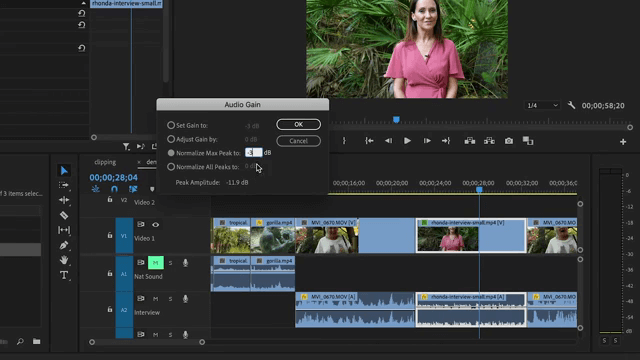
- Normalize – this is the most accurate and quickest volume adjustment technique
- Right-click audio clip or shortcut G
- In the dialog box, click on Normalize Max Peak to:
- Enter the dB number where you want your audio to peak, such as -3
- Click OK
- Notice the audio levels will rise no higher than the number you entered
- Gain
- Right-click audio clip or shortcut G
- In the dialog box, click on Adjust Gain by:
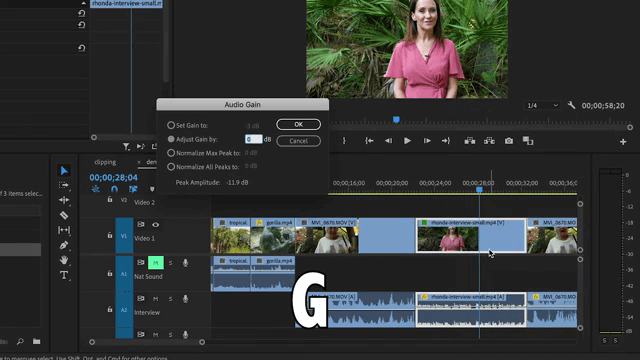
-
- Enter the number of dBs that will bring it to the level you want
- Click OK
- Notice your wavelength in the audio clip changes
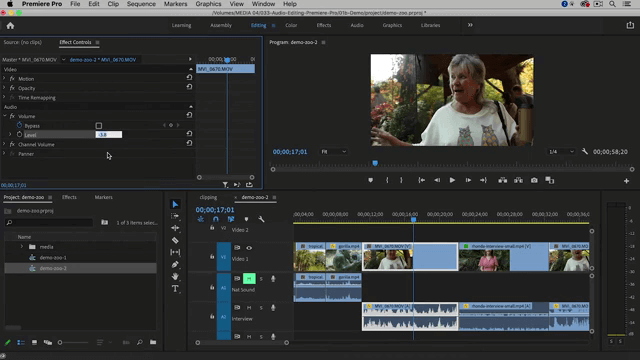
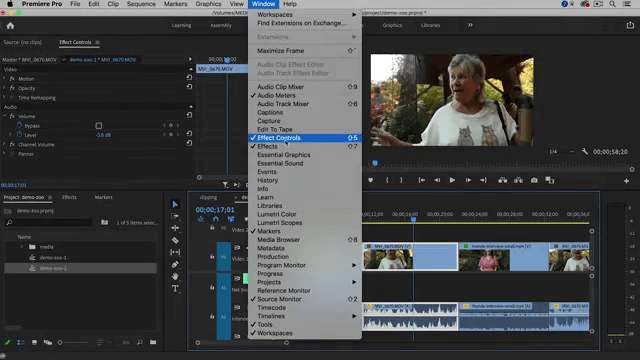
- Volume Property (more precise than manual adjustment below)
- Go to Window > Effect Controls
-
- On the left side (Source Monitor area), scroll to Volume Property
- Click to open the Volume Property
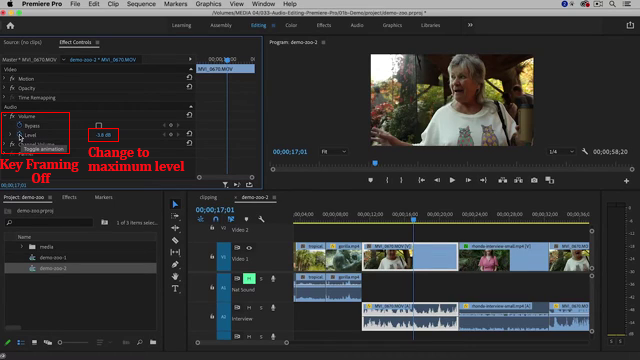
- Turn off Key Framing by clicking on the little Stopwatch icon next to Level
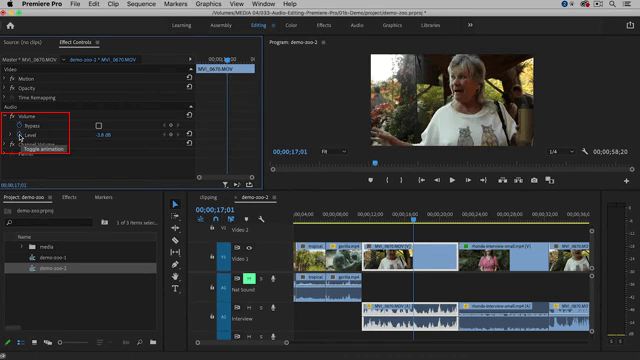
-
- Click on the number
- Change to the maximum decibel level
- Manually Adjust White line (less precise than Volume Property)
- Find the white line on the audio track
- Click and drag up to increase the volume, drag down to decrease the volume
- Notice the number in the lower right corner when you are dragging, this indicates the maximum decibel (dB) level.
Editing Music
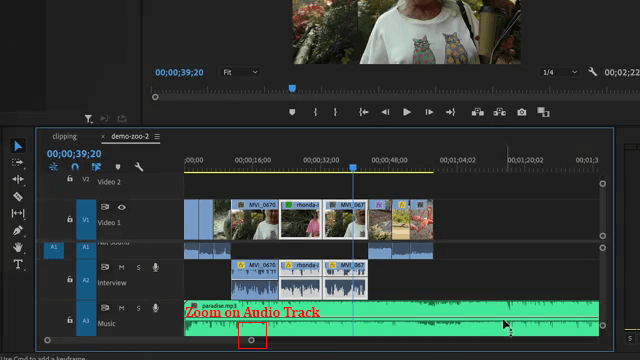
Trim music track
- Click handle at bottom of the screen
- Drag to zoom in on tracks
- Choose Razor Blade tool in Tool Panel
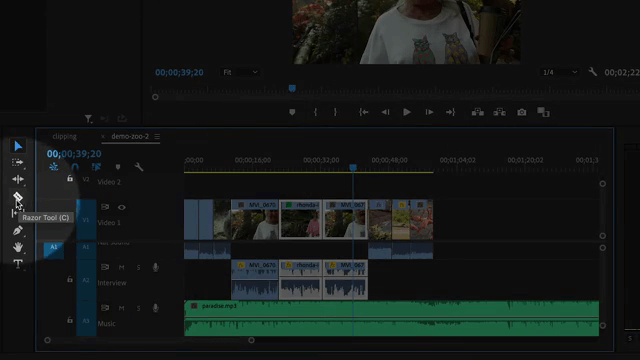
- Click Razor Blade tool on music track directly beneath where the video clip stops
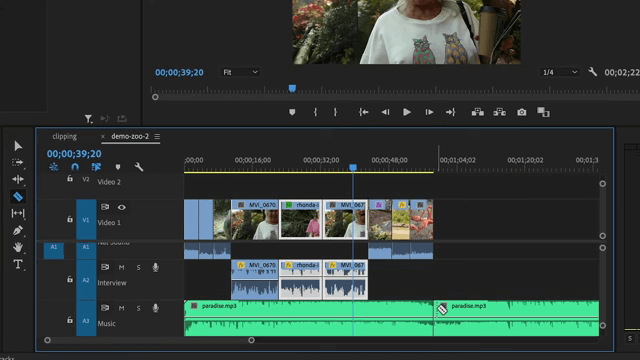
- Choose Selection tool in Tool Panel
- Click on the extra music portion
- Click Delete to remove it
Mute all other tracks with the Solo button
- Click on the S to the left of the audio track that you want to hear (usually the dialog audio) This will mute all other tracks so only the sound on that track is heard.
Fading Music In and Out With Keyframes
- Click on the Pen tool in the Tools Panel
- Click handle at bottom of the screen
- Drag to zoom in on tracks
- With the pen tool, click on the white line to begin keyframe.
- A few seconds beyond the keyframe beginning, click on the white line to end the keyframe
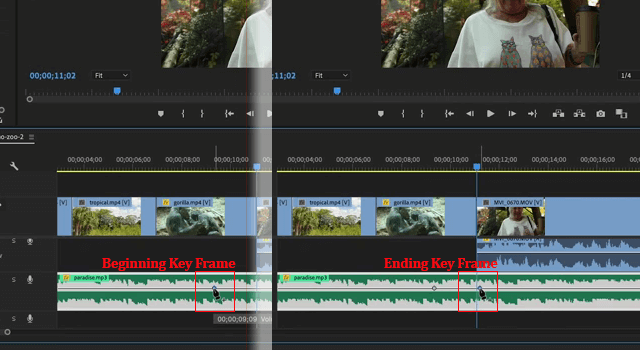
- Click and drag marker down or up, depending on whether you are fading out (down) or in (up)

Note 1: Music is all different so this requires a little bit of trial and error regarding the best place to start fading and returning to a normal level.
Note 2: Keyframes should be a couple of seconds apart to allow for a nice fade on transitions at the beginning and the ending of clips
You can add a lot of exciting audio features to your video by adding sound effects and using multiple audio tracks, using combinations of these very basic techniques.
Feel free to ask any questions in my comments section. And subscribe to my YouTube channel for more great time-saving tutorials.


 Premiere Pro Training Classes
 After Effects Training Classes
 Photoshop Training Classes
 Dreamweaver Training Classes
 Web Development Training Classes
 WordPress Training Classes