Learn my favorite Premiere Pro shortcuts to accelerate your workflow and save time! These are techniques every beginner needs to know.
Premiere Pro is a powerful program that is packed with great features. But sometimes it seems that there are too many options and buttons! It can be overwhelming for users, especially beginners. Watch the video for a full breakdown of the 7 top Premiere Pro shortcuts or read below for a quick summary:
1. Maximize Panel
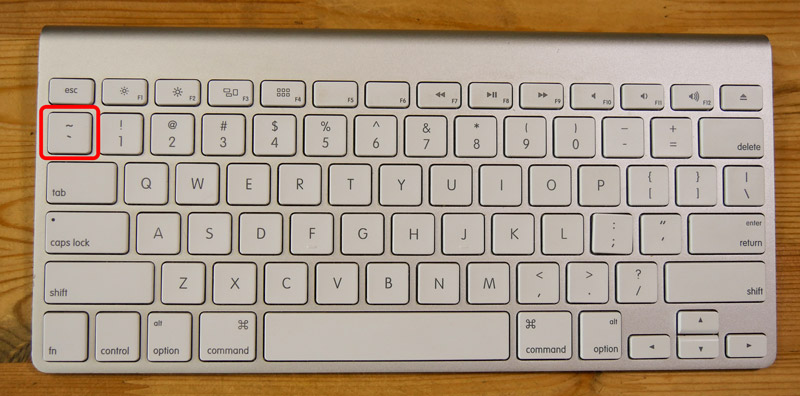
Every window in the Premiere Pro interface is called a panel. You can maximize any panel by moving your mouse over top of it, then choosing the Accent (`) or Tilde key (~) on your keyboard. Then it will expand to take up your full screen! On most keyboards, this key is found in the top left corner just underneath the Esc key (see below for image). Hit the same key again to make the panel go back to normal size. I use this technique all the time with the Project panel and the Timeline, where all of my media clips are. But it can be used for any panel in Premiere Pro.
2. Zooming in Timeline
When you are editing you will spend a lot of time zooming in and out of the Timeline. Sometimes you want to focus on a single edit between clips. Sometimes you want to see the entire Timeline. My favorite way of doing this is by using:
- The minus key (–) to zoom out.
- The equals key (=) to zoom in.
- The backslash key (\) to view the entire Timeline.
Be careful not to mistake the backslash (\) key with the forward slash (/), which does something completely different.
And be sure to use the keys at the top of your keyboard, as the keys may not work on the number pad of an extended keyboard. 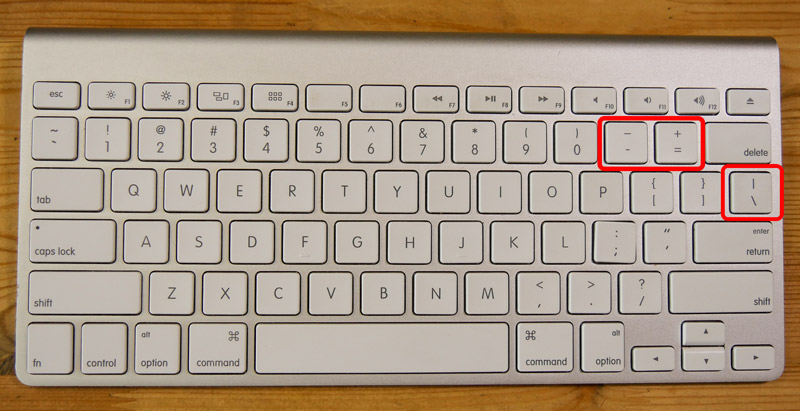
3. Go to Next/Previous Edit
One of the fastest ways of moving through the Timeline is simply by using the Up arrow and the Down arrow keys. The Up arrow will take you to the previous edit and the Down arrow will take you to the next edit. These keys are one of my favorite ways of moving through the Timeline efficiently!
4. Ripple Edit with Q and W
These shortcuts are more advanced, but with some practice they can speed up your editing tremendously. First move your playhead over top of any clip in the Timeline. Then use Q to trim the beginning of the clip, or use W to trim the end of the clip.
5. Re-arrange Clips
Moving clips around the Timeline can be a real challenge, and there are many ways to do this. One of the fastest ways is simply to hold down the Command (Mac) or the Ctrl (Windows) key, and then drag a clip to a new location and it will automatically be inserted at the new location.
6. Add Transitions
Select any clip in the Timeline and then use Command-D (Mac) or Ctrl-D (Windows) to apply a default transition to that clip. You can also select multiple clips and use the same shortcut to apply a transition between all the selected clips. Very handy!
7. Reset Workspace
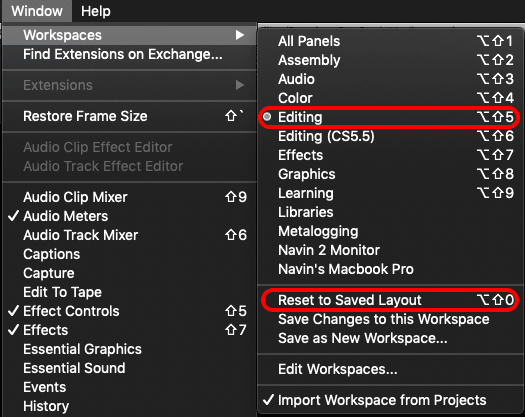
Sometimes all it takes is a single click to completely mess up your interface! To fix it, go to Window > Workspaces and choose Editing or the workspace of your choice, and then choose Window > Workspaces and Reset to Saved Layout and it should snap back to normal.
Bonus Premiere Pro Shortcut: Undo
This is a common shortcut used in Premiere Pro and many other programs. If you make a mistake simply Undo it with Command-Z (Mac) or Control-Z (Windows). If you need to Undo multiple steps just keep hitting Command-Z or Control-Z and you can step backwards in time. This has saved me many times!
About the Author
 The Web Guru (also known as Navin Kulshreshtha) is an Adobe Certified Expert and Instructor who writes and blogs about web, video and Adobe software. His Youtube channel has hundreds of thousands of views, and he also runs a successful media company.


 Premiere Pro Training Classes
 After Effects Training Classes
 Photoshop Training Classes
 Dreamweaver Training Classes
 Web Development Training Classes
 WordPress Training Classes